Author

The Indian Foodie

Browsing

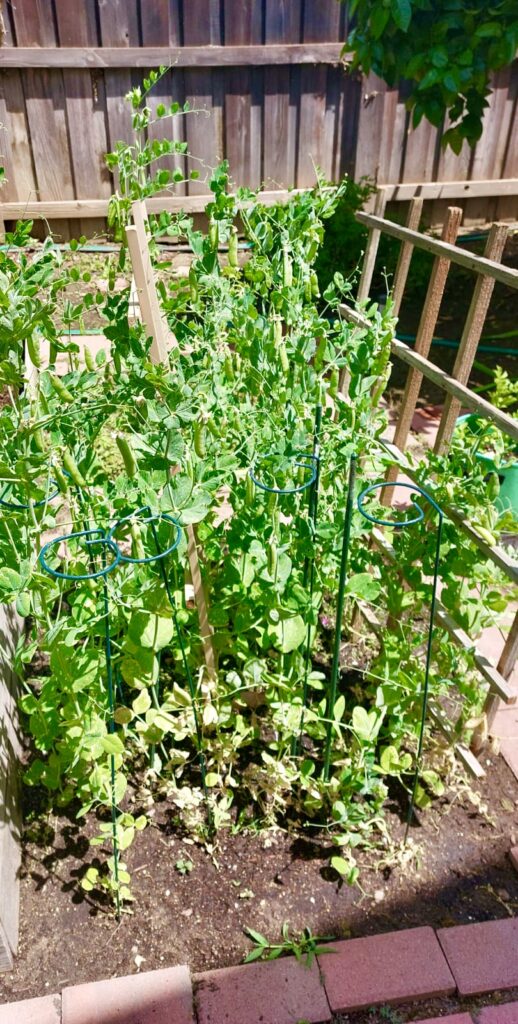
We are back from a ten-day vacation. My vegetable garden is relatively new, and I am anxious to check how it has fared with only the timed sprinklers watering it.

Not bad!

The plants are still alive, and the two zucchini plants I cultivated are spread thickly over the plot. Peeping out from under the foliage, I spy a bit of zucchini. I pull at the fruit. It is over one foot long. It is the largest I have seen, and it has a companion. These were just beginning to grow when we left on our trip. That’s when I learned that zucchini grows very fast, so it’s a good idea to keep an eye on them when they grow so you can harvest them young and tender.

The Indian equivalent of zucchini is a gourd called Toree. It has a mild, slightly sweet flavor. Like most squashes, it takes on the flavor of the seasonings and spices it is cooked in.

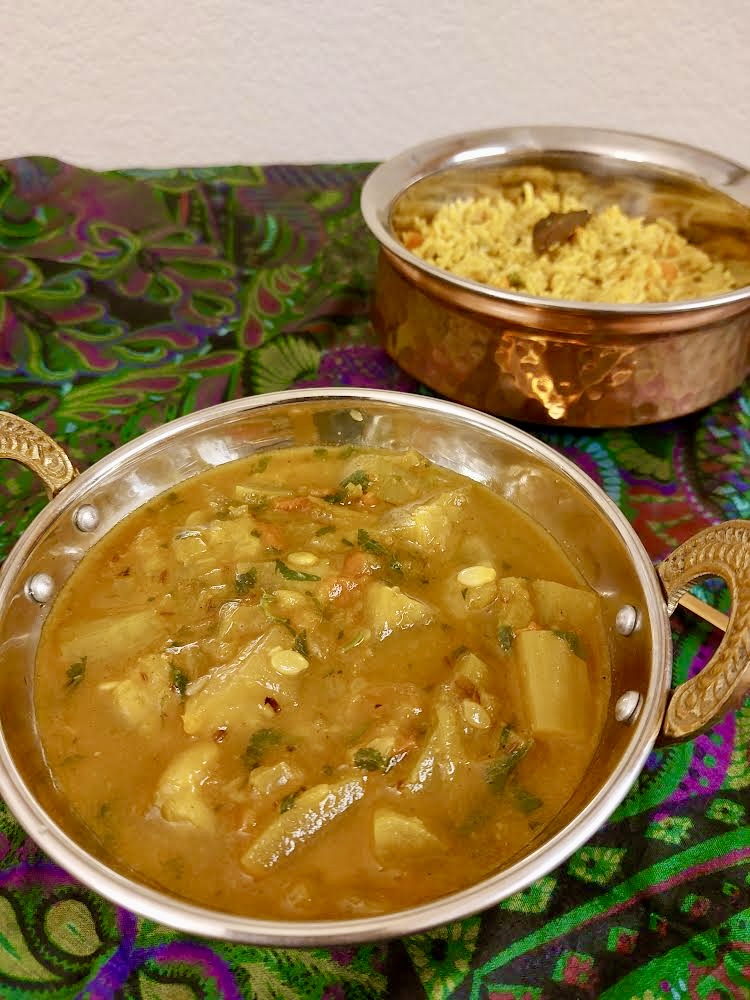
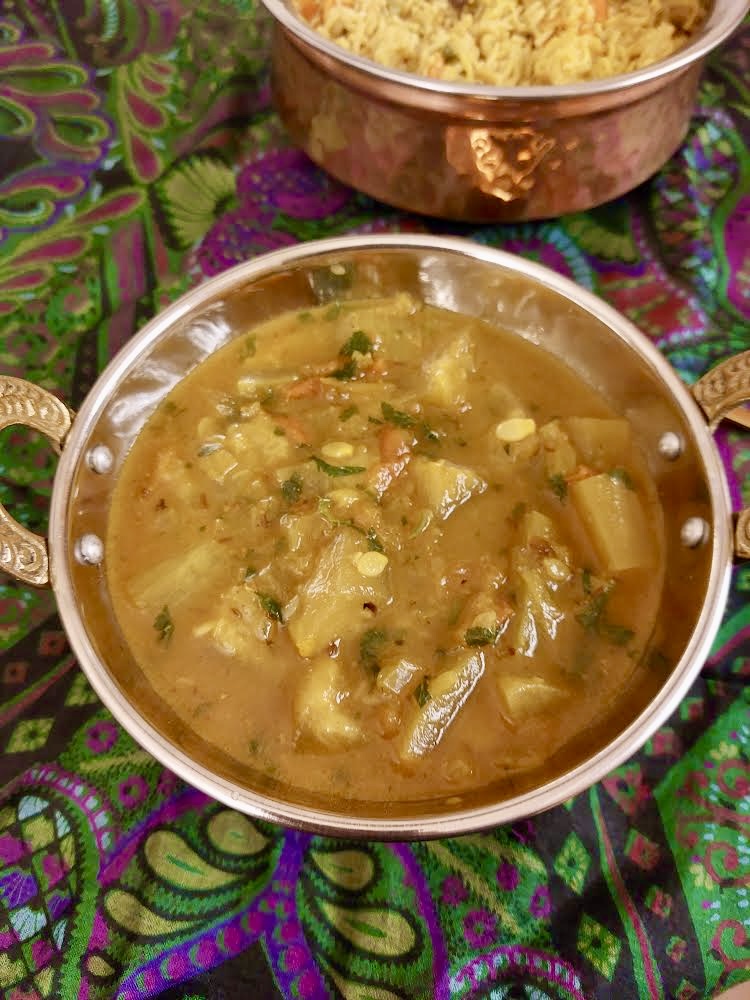
I cook zucchini with a five-seed seasoning called panch pooran (five seeds). I add a little heat to this dish to counter the slight sweetness of the zucchini. Panch Pooran seasoning is available at Indian grocery stores, but I have included a recipe for it in the notes. It goes good with squashes and cabbage.

Tori Panch Pooran Sabzi (Five-Seed Zucchini Vegetable)

Prep Time 15 minutes
Cook Time 15 minutes
Total Time 30 minutes
Servings 4
Sautéed with exotic seeds, this dish goes well in a wrap or as a side with roti, dal, or rice.

Ingredients

  • 4-6 medium zucchini
  • 1 tsp 5-seed seasoning
  • 1-2 small dry red chilies (more or less, to your taste)
  • ¼ tsp red chili flakes (more or less, to your taste)
  • ½ tsp turmeric powder
  • ½ tsp salt (more or less, to your taste)
  • 2 tbsp cooking oil

Panch Pooran Tadka

  • 1 tsp mustard seeds
  • 1 tsp coriander seeds
  • 1 tsp fennel seeds
  • ½ tsp fenugreek seeds
  • ½ tsp onion seeds (you can substitute 1 tsp cumin seeds for the onion sees.)

Instructions 

  • Wash the zucchini. Cut the stalk end. Split the zucchini in half length-wise and then again in half length-wise. Chop into bite-sized bits. Don't cut the bits too small, as they get squishy fast.
  • In a wok or skillet, heat the oil on medium heat. Lower heat to medium-low and add the red chilies, give them a stir, and let them darken for about 30 seconds. They are pungent, so don't inhale, or you will start coughing!
  • Add the five-seed seasoning, wait 30 seconds for it to crackle and pop, then quickly add the turmeric powder.
  • Stir for a few seconds before adding the zucchini.
  • Stir until the zucchini is nicely coated.
  • Turn the heat up to medium and cook uncovered, stirring occasionally, until the zucchini is done(approximately 10-15 minutes).
  • You can leave the vegetable crunchy or soft to your liking. You do not have to add water as the zucchini releases enough moisture to cook in.    
  • This dish goes well in a wrap or as a side with roti, dal, or rice.   

Panch Pooran Tadka

  • Toss all the ingredients together and store them in ajar.
  • Fenugreek is a bitter seed; if you are not used to it, you can reduce it to 1/4 teaspoon.
  • Panch Pooran can be used when fixing different squashes and cabbage.

Notes

Watch the stove's heat as you do not want the tempering to burn.
Click here for Gobi (Cabbage) Panch Pooran.
_______
Home-grown Tori!
Course: Side Dish, Vegetarian
Cuisine: Indian
Keyword: sabzi, tori, zuchinni

It is the winter holidays, and school is out. Dad is stationed in  Calcutta. Dad and Mom’s social life is pretty hectic. Nanny watches us like a hawk when they are out for cocktails, dinner, or at the club.

Daniel, our cook, is prepping for a pre-Christmas party. Some of us, older siblings, have helped him beat the eggs for the vanilla cake and are fascinated as he slowly places the cake in a large round tin half filled with sand sitting on top of the sigiri (a clay stove fueled with coal).

Daniel tests to see if the sand is hot enough. He then slowly sets the cake pan in the middle of the drum on top of the sand. He then covers it with a fitted lid and places hot coal on top. This way of cooking was the method that Daniel preferred to use to bake our cakes, and they always turned out delicious.

In those days, other than clubs, restaurants, and military dining halls, ovens (other than tandooris) were not widely used in Indian homes since most Indian cuisine did not require it. The local bakeries, schooled under the British Raj with recipes handed down for generations, baked some of the best pastries and cakes I have ever eaten. They would also oblige families by baking any homemade cakes in their ovens upon request—and for a fee, of course!

With time, stovetop and small electric ovens found their way into homes. Baking ovens have now become a necessity in most urban Indian homes.

I used to bake cakes from scratch, but when I moved to the US, I  took the easy way out and used packaged cake mixes. The one that I like best is the Super Moist Yellow Cake Mix. My twin was in town one holiday season when I prepared to bake the cake. She suggested I substitute some water with rum and fix a rum cake.

The Rum Cake became a big hit at potlucks, church gatherings, dinners, and as baked gifts to my neighbors for Christmas. Thank you, Twin!

Rum Cake

Prep Time 10 minutes
Cook Time 30 minutes
Total Time 40 minutes
Servings 12
A delicious, festive, super moist yellow cake drizzled with rum!

Ingredients

  • 1 box yellow cake mix (I like Betty Crocker's Super Moist Yellow Cake or Duncan Hines Classic Yellow Deliciously Moist Cake)
  • ½ cup vegetable oil (Please check the instructions on box to see the exact amount of oil needed as it may differ)
  • 3 eggs
  • ¾ cup water
  • ¼ cup rum (Ensure it is an excellent strong rum, white or dark)
  • powdered sugar (for dusting the cake - more or less, per your taste)
  • dash cake sprinkles

Instructions 

Yellow Cake

  • Prepare according to the instructions on the box.
  • Keep an eye on the cake towards the end to ensure it does not dry out. I generally stick a bamboo skewer into it 5 minutes before the bake time. If it comes out clean, I remove it from the oven and allow it to cool.
  • Once cool, dust it with the powdered sugar and decorate the top with sprinkles. 

Notes

Where the recipe on the box indicates adding water, substitute it for ¼ cup of the water with a ¼ cup of rum (I've already done this in the recipe above).
Sometimes, my twin will make a Buttercream frosting or rum drizzle.

Buttercream Frosting

Check Wilton's easy recipe. Click the link here: Best Homemade Vanilla Buttercream Frosting.

Buttercream Rum Drizzle

1 cup Buttercream Frosting
¼ cup rum
Heat the cup of buttercream frosting in a saucepan on low heat. When it starts to bubble, add the rum. Be careful as the rum makes the frosting bubble up.
Stir and drizzle it over the cooled cake.     
When I prepare the drizzle, I take a cup of store-bought frosting and zap it in the microwave for less than a minute. Remove from the microwave, and add the rum. Stir and drizzle the mixture over the cake.
I do prefer the light sugar dusting!
Course: Dessert
Cuisine: American, British
Keyword: Christmas, rum, yellow cake

Salads are always a part of an Indian meal, especially during the hot summer months. Most are a medley of fresh vegetables tossed with a splash of lemon juice and a sprinkling of your choice of exotic and aromatic spice powders.

Salads are more elaborate for parties, with vegetables cut in the form of flowers, plants, bird plumes, etc. Indian salads with a simple dressing pair well with curries, dals, sabzis, and rice dishes.

Indian salads include Kachumber (a combination of chopped onions, tomatoes, cucumber, and green chilies), veggies like cucumber and potato mixed with yogurt, and Kachumber Raita (Kachumber mixed with yogurt).

As access to cooking videos via social media has grown exponentially. Salads in urban areas of India have also started to include more Western style salads and dressings. Boiled chickpeas, black beans, sprouted beans, paneer, cheese, and seeds like peanuts, sunflower, cashew nuts, walnuts, almonds, raisins, and pomegranate seeds have found their way into Indian salads.

If you choose to include a salad in an Indian meal you are fixing, there are no hard and fast rules! Use your palate and imagination to create your masterpiece.

Popular vegetables used in Indian salads are onions (red or yellow), boiled beetroot, cucumber, carrots, tomatoes, red radish, daikon radish (long white Japanese radish), green chilies, fresh mint, and coriander, along with a sprinkling of lemon juice

Seasoning spice powders choices for salads are black pepper, chaat masala, black salt, chili powder, and salt.

Since my hubby’s retirement, he has expanded his creative side to fixing us salads. I would be remiss if I did not include pics of some of his creations!

An Indian Salad

Prep Time 15 minutes
Cook Time 15 minutes
Total Time 30 minutes
Servings 4
Indian salads with a simple dressing pair well with curries,dals, sabzis, and rice dishes.

Ingredients

  • ½ medium red onion
  • ½ medium daikon radish (peeled, cut in half, and then into strips)
  • 1 medium carrot (peeled, cut in half, and then into strips)
  • 1 large tomato (sliced into 8 wedges—keep the base intact)
  • 4 red radishes (greens removed, and quartered)
  • 1 medium cucumber (sliced into rounds)
  • ½ lemon or lime

Instructions 

  • On a salad or large plate, arrange the onions at the edge of the plate at spaced intervals.
  • Next, layer your cucumber at the base of the onions rounds.
  • Arrange your carrot and daikon strips between the onions.
  • Now place your tomatoes in the center of the plate and the radish in the center of the tomatoes.
  • Sprinkle lemon juice and your choice of spice powders. 

Notes

My husband Al's special U & A salad for me.
Course: Salad, Vegetarian
Cuisine: Indian
Keyword: cumcumber, fresh vegetables, salad, tomatoes


Egg curry, a tangy blend of onions, tomatoes and spices that are used as a base for boiled eggs, was a good substitute for vegetarian guests at a luncheon or dinner party. My husband, an officer in the Air Force, lived on the base (the Air Force Station). So any party one had invariably numbered over twenty guests. Buffet-style meals were the way to go, and you catered for vegetarian and non-vegetarian guests.

Egg curry was also a quick go-to to stretch the meal for unexpected lunch or dinner guests.

You can make egg curries in several ways, depending on which state in India you live in. This is the Punjabi version of the various recipes out there.

Anda ki Curry (Egg Curry)

Prep Time 20 minutes
Cook Time 30 minutes
Total Time 50 minutes
Servings 4
A tangy blend of onions, tomatoes, and spices is a delicious base for boiled eggs—a good dish for vegetarian guests!

Ingredients

  • 6 eggs
  • 4 tbsp cooking oil
  • 2 medium Bay leaves
  • 2 green cardamom
  • 1 green chili, slit (more or less chili; optional—adjust to your taste)
  • 2 medium yellow or red onion (chopped fine)
  • 1 tbsp ginger-garlic paste
  • 1 tsp turmeric powder
  • 2 tsp coriander powder
  • ¼ tsp red chili powder (more or less chili powder; optional—adjust to your taste)
  • 2 medium tomatoes (pureed or 2 tbsp tomato paste)
  • ¼ tsp cinnamon powder
  • ¼ tsp clove powder
  • ¼ tsp pepper powder
  • 1 tsp salt (or to taste)
  • 2 cups warm water

Optional

  • 2 medium potatoes (quartered )

Garnish

  • ½ tsp garam masala (optional )
  • 2 tbsp fresh cilantro (coriander leaves) (finely chopped)

Instructions 

To Boil Eggs:

  • Lay the eggs at the base of a saucepan large enough to hold them. Add enough water to cover them by about 2 inches.
  • On medium heat, bring the water to a rolling boil. Turn off the heat. Set aside for 10 minutes.
  • After 10 minutes, transfer the eggs to a bowl of ice-cold water. Crack them slightly before immersing them. (It is easier to peel the eggs when they are cool).
  • Peel, rinse and wipe the eggs dry with a paper towel. With a toothpick, carefully poke a few holes around the egg. This allows the gravy to flavor the egg. Set the boiled and peeled eggs aside.

For the Curry

  • Heat the oil in a deep skillet or saucepan on medium heat. The oil should be hot, not smoking, or your spices will burn.
  • Add the Bay leaves, green cardamom, and slit green chilies. Stir it.
  • Add the finely chopped onion and sauté for about 7 minutes until golden.
  • Add the ginger/garlic paste, turmeric, chili powder, coriander powder, and cumin powder. Stir for a minute until the ginger sticks to the pan's bottom. Be careful not to burn the masala.
  • Add the tomatoes, cinnamon, clove, pepper powder, and salt. Cook, occasionally stirring, until the tomatoes are soft and the oil starts to surface—approximately 4-5 minutes.
  • Add 2 cups of water and bring to a boil.
  • Add potatoes to the tomato-onion mixture.
  • Lower heat to medium-high and simmer for about 10 minutes until you get a thick gravy and the potatoes are done. At this point, do a taste test for salt.
  • Add the eggs and let them simmer on low for another 7-10 minutes while gently rolling them around occasionally to absorb the gravy.
  • Add a little more hot water if the gravy gets thicker than you prefer. Be careful not to make the gravy too watery.
  • Spoon into a serving dish. You can leave the eggs whole or carefully split the eggs in half-length wise.
  • Garnish with chopped cilantro.
  • Serve with plain boiled rice or pilaf.
  • Anda Curry also tastes good with parathas or any flatbread. I like to have it with any kind of bread to dip in the gravy. It tastes amazing! 

Notes

The boiled eggs may be sautéed lightly all around to give it a bit of a crust. I prefer not to do so.
You can use whole cinnamon, cloves, and pepper instead of powders.   
If you are using tomato paste, just add it when the recipe calls for you to add the tomatoes. 
Mom would add potatoes to expand the dish because we loved curried potatoes or when we had extra guests (which was always a given!).
Course: Main Course, Vegetarian
Cuisine: Indian
Keyword: curry, eggs

A favorite memory: It is a hot summer’s day. This particular evening, Aunty Sheila has invited us to her place for a party. It is always fun to visit her, as we kids on both sides of the family are around the same age and have a great time together. Aunty has a warm, bubbly personality and throws great parties. Her place is not too far from ours, so, giggling and laughing, we girls walk over, we love walking—even in the heat of the day.

Hot and starting to perspire by the time we get there, our eyes light up as we see that Aunty has already set up an outdoor table of party fare. In the center is a large tray with a giant watermelon propped securely on it. Around the watermelon are other delicious treats. She greets us with her usual big smile and hug and tells us to help ourselves to some watermelon juice. We happily walk across the lawn to the table. The top quarter of the melon has been sliced out, and we peer into the cut melon. The fruit inside has been carefully carved out and then blended with cold black tea and lemonade. Chunks of melon still float around for those who want to eat the fruit. We thirstily gulp down the Watermelon Tea Cooler and help ourselves to more. The drink is so cool and refreshing on that Indian hot summer’s day.

Years later, thinking about some of my fun memories of life in India, I decided to try and duplicate the recipe. I enjoy serving this taste of memory to my family and friends who tell me that I have been successful in duplicating the recipe!

Watermelon Tea Cooler

Prep Time 15 minutes
Cook Time 5 minutes
Total Time 20 minutes
Servings 8
A cool and refreshing drink on an Indian hot summer’s day.

Ingredients

  • 3 tea bags black tea (your choice of brand, caffeinated or decaffeinated)
  • 4 cups water
  • ½ cup simple syrup (see recipe below)
  • ½ cup lime or lemon juice
  • 2–3 cups watermelon chunks, seeds removed
  • 1 tbsp Chopped mint and lemon or melon wedges for garnish (optional)

Instructions 

  • Put tea bags in a container that will hold the 3 cups of water. Boil the 3 cups of water, and when they come to a boil, pour the boiling water over the teabags. Let the bags steep for at least 3 minutes. Remove the tea bags and let the tea cool.
  • Once cooled, place it in the refrigerator. You can do this a day ahead or a few hours before you are going to make the cooler.
  • Blend the watermelon chunks in until it is like a smoothie. In a pitcher that holds at least 6 cups of water, add the tea, simple syrup, lemon juice, and melon smoothie. Stir it all together until nicely mixed. Add some crushed ice when ready to serve.
  • If it is too tangy, you can add more crushed ice or cold water.

Notes

Notes:
-This is a great drink for summer refreshments served with  cucumber, watercress or tomato sandwiches.
-You can kick it up a notch for adults by adding a splash of gin or vodka! Check out this site. I love the cause.  https://boozeforpaws.org/
-If you want to go the route of scooping out the melon and using it as a container, it makes a wonderful and impressive presentation. Unfortunately, no matter how well I plan, I find myself invariably short on time and scrambling for an easy way out!
-Scooping out the melon and using it as a container makes a wonderful and impressive presentation. 
Simple Syrup
Ingredients:
½ cup fine-granulated sugar
½ cup water
Directions:
1. In a saucepan, on low heat, dissolve ½ cup of sugar with ½ cup of water (approximately 3 minutes).
2. Take the saucepan off the heat and leave the syrup to cool.
3. When cool, pour the syrup into a clean glass bottle that has a tight lid.
4. Rinse the bottle both with boiling water (do not wipe with a cloth as it may leave bacteria).  
5. Refrigerate the syrup until ready to use. It should last a month in the fridge. It should remain a clear liquid. If it turns cloudy, throw it out as that is a sign of bacterial growth! 
6. The ratio for simple syrup is one part sugar and one part water so you can always make more to store.
Course: Drinks
Cuisine: American, Indian
Keyword: lemon, Tea, watermelon

Dad is stationed in the town of Ajmer in the northwest of India. Ajayadeva, an 11th-century Rajput ruler, founded it. It surrounds the expansive lake of Ana Sagar and is surrounded in part by the Aravalli Hills range. Ajmer’s most historic landmark is the Sharif Dargah, considered among India’s holiest Muslim shrines. Khwaja Moin-ud-din-Chishti, a Sufi Saint from Persia, is enshrined there. Pilgrims worldwide visit to be blessed by the Khwaja and have their wishes and desires come true.

Ajmer is 8 miles from Pushkar, a town that hosts the Pushkar Mela (Fair). It is one of the world’s largest camel/cattle fairs. Like all fairs, it holds other attractions, amusements, local arts, crafts, and food. Multitudes descend on Pushkar to enjoy the fair. Pushkar Lake, located by the town, is a sacred lake to the Hindus.

Ajmer is different from the other towns we have lived in. It is a semi-desert, arid climate.

Dust storms precede the monsoon season—with its welcome rain and coolness from the heat. These dust storms kick up the dry earth and transport it with strong winds into every nook and cranny. It is like a sandstorm; you better get inside if you see it coming!

One such storm is on its way. The wind is picking up, and the sand blots out the sun. Mama calls out to us kids to shut all the doors and windows. We scramble. The dust storm hits and soon passes, followed by the sweet smell of rain. It is pretty heavy for the long-awaited monsoon season’s first rain. I can smell the dry earth soaking up the moisture. Since it is tea time, Mama has cook fix us pakoras to accompany evening tea. They are perfect for a rainy monsoon evening!

Pakoras (aka Bhajis) are deep-fried fritters or dumplings made with chickpea flour (besan). The chickpea flour used is the Indian small brown chickpea, not the garbanzo chickpea. You can fix pakoras with various vegetables such as potatoes, spinach, onions, zucchini, eggplant, cauliflower, cabbage, spinach, chilies, or a combination of vegetables. as well as paneer.

Pakoras can be made prepped in two ways. One, you dip the vegetable of your choice into the seasoned chickpea batter to coat, and then deep fry them.

The other method is to chop or grate a combination of vegetables. Add the chickpea flour and seasonings, and then deep fry them.

This recipe is the batter dipped and fried pakoras. Pakoras are served as snacks or appetizers, but generally a tea-time snack served with hot milky sweet chai.

Allu Pakoras (Savory Potato Fritters)

Prep Time 20 minutes
Cook Time 20 minutes
Total Time 40 minutes
Servings 6
Pakoras(aka Bhajis) are deep-fried savory fritters or dumplings made with chickpea flour(besan).

Ingredients

  • 2 cups potatoes (peeled and sliced not thicker than 1/4 inch)
  • cup besan (gram flour)
  • ¼ cup rice flour (optional)
  • ½ tsp turmeric powder
  • ½ tsp cumin powder
  • ½ tsp chili powder (or to your taste)
  • tsp ajwain seeds (thymol or carom seeds)
  • tsp baking soda
  • 1 tsp salt (or to your taste)
  • ½-¾ cups water
  • 2 cups oil (for deep frying—use an oil with a high smoke point like peanut or canola, safflower, or soybean)
  • Dash chaat masala or black salt (available at any Indian grocery store)

Instructions 

  • In a mixing bowl, combine all the dry ingredients.
  • Add a little water at a time and whisk until smooth. The consistency should coat the back of a spoon. You don't get delicious pakoras if the batter is too thin.
  • Scrub, peel, wash, and slice the potatoes. Keep a bowl of water handy and place the cut potatoes in the bowl as you go along. Do not cut them too thin or too thick.
  • Rinse again, drain, and pat dry with paper napkins or a kitchen towel, and place them in the chickpea batter. If you don't pat or drain them dry, the excess water will thin the batter, and the pakoras will end up with a thin layer of batter.   
  • Heat oil on medium-high heat in a deep wok or pan (approximately 350 degrees if you use a reading thermometer).
  • When hot, carefully pick each slice of potatoes from the batter and slide them in slowly and carefully into the hot oil. You can use kitchen tongs to do this. I use my fingers, but you must be careful of the hot oil.
  • Deep fry in batches on medium heat till golden brown. It takes about 4-5 minutes on each side.
  • Remove with a slotted spoon or sieved spatula and drain on paper towels to absorb excess oil. If any crisp bits are floating around from the batter, remove those too before you put in the next batch to fry.
  • Depending on how large your fryer is, it will take several batches. Do not crowd them in. 
  • Sprinkle chaat masala or black salt over the pakoras and toss gently.
  • Place hot pakoras on a serving dish.
  • Serve with mint chutney, tamarind chutney, tomato ketchup, or hot sauce.

Notes

Rice flour absorbs excess moisture, giving the pakoras a crispier finish.
You can also cut the potatoes in half and fix many varieties of them.
Pakora Variations
Cauliflower Pakoras
Substitute the potatoes for cauliflower flowerets. Cut about 2 cups of the flowerets to about an inch or a little more in size. Slice lengthwise and in half again in case the pieces are too broad. Wash, pat dry, dip in batter, and fry. Turn gently after 3-4 minutes. Fry until you get a nice golden brown color—approximately 8 minutes.
Zucchini Pakoras
Wash two medium zucchini, pat dry, and slice into circles. Add to batter, coat each slice well, and deep fry in batches, slowly turning them around till golden brown. Approximately 6-7 minutes.
Eggplant Pakoras
Wash the eggplant and cut it into thin circles. If you use the large Black Beauty variety, you can cut the circles in half if they are too large. Wash and pat dry. Dip in batter and fry on medium-high heat till golden brown on both sides. Approximately 8-10 minutes. 
Course: Appetizer
Cuisine: American, Indian, Vegetarian
Keyword: pakora, potatoes, vegetables