

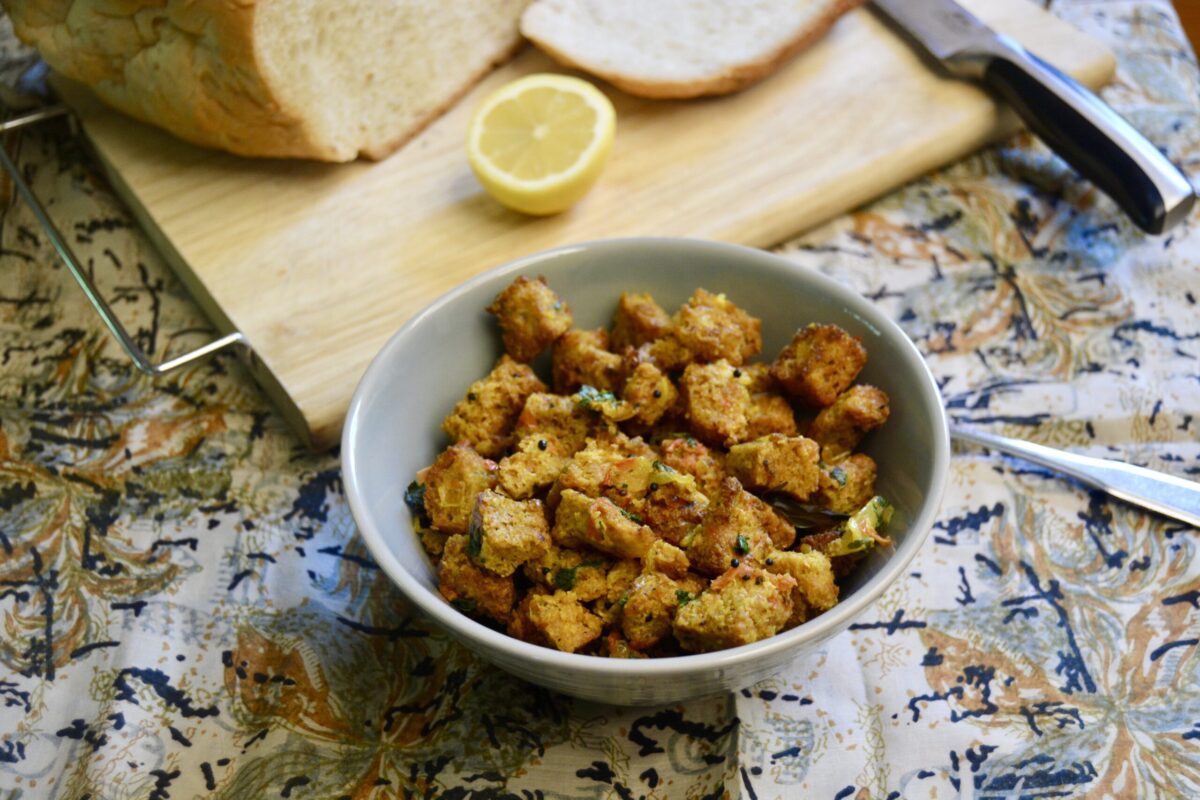
Sometimes I get into the mood to bake bread, and I take the easy route. Years ago, when volunteering at our church thrift shop, I picked up an almost brand-new bread machine for less than half the market price. Now when the mood hits for fresh homemade bread, I pull it out and go for it! Today I have a half loaf lying around— a product of five days ago. I decide to fix Bread Uppma for breakfast. Most Indians refer to bread as ‘double roti,’ or simply bread.
Bread uppma is great for breakfast or a tea-time snack. It is savory and tangy, and, of course, who doesn’t love bread!!
Bread Uppama
Bread uppama is great for breakfast or a tea-time snack. It is savory and tangy, and, of course, who doesn't love bread!!
Ingredients
- 12 slices bread (preferably stale, toasted, and cut into 1-inch cubes)
- 2 tbsp cooking oil
- 1 Serrano chili (chopped one whole red chili optional—to your taste)
- ½ tsp black mustard seeds
- 8-10 curry leaves
- 1 cup onion (chopped finely, yellow or red)
- ½ tsp turmeric powder
- 2 medium tomatoes (chopped-about 1 cup)
- ½ tsp salt
- ½ tsp lemon or lime juice (only)
- ½ cup cocktail or sautéed peanuts or cashew nuts
- 1 tbsp fresh cilantro (coriander leaves) (washed and chopped, for garnish)
Instructions
- In a large skillet, heat the oil on medium heat.
- Add the chopped green chili or red chili. Stir a couple of times and add the mustard seeds. Be careful as they splutter.
- Give it less than 30 seconds, and add the curry leaves. Stir and add the onions.
- Sauté the onions for about 6 minutes until they are translucent and start to turn reddish in the corners.
- Add the tomatoes and sauté for another 4 minutes until the tomatoes are soft and the oil starts to surface.
- Add your choice of nuts (optional) and give them a stir.
- Now stir in the toasted bread cubes until they are nicely coated with the onion and tomato mixture.
- Add a ¼ cup of water. Lower the heat and cover the skillet. Let it cook for 2-3 minutes.
- Remove the lid, sprinkle the juice of half a lemon/lime, and stir. Cover and let it sit for 5 minutes before serving.
- Remove to a serving dish and garnish with the chopped cilantro.
Notes
You can add the nuts as a garnish as well.
If you are gluten-free, you can make it with gluten-free bread.
One legend of Valentine’s Day is that a priest in the third century performed secret marriage ceremonies for couples as Emperor Claudius of Rome outlawed marriage for young men. The Emperor felt single men would stay more focused as soldiers. The priest was beaten, stoned, and beheaded when the Emperor found out. Valentine’s Day has become a day to celebrate love.
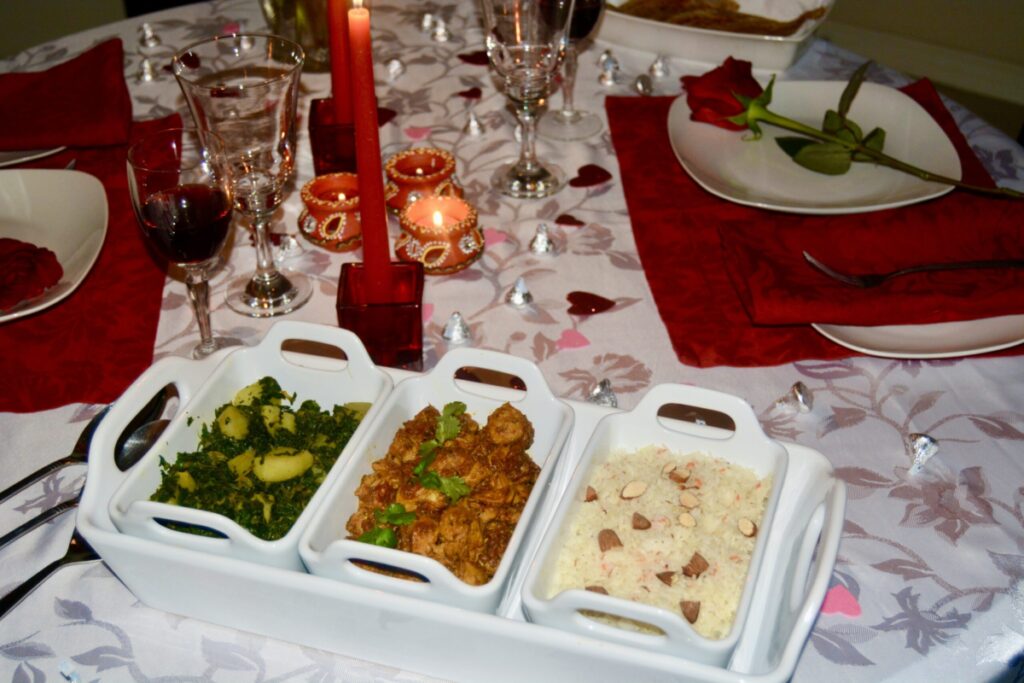
If you want a special meal to celebrate your loved one this Valentine’s Day, here is an easy menu for a delicious Indian meal that can be prepared early and left in a warm oven until you are ready to eat. The dishes are light on spices. You can prepare it a day ahead, zap it on the microwave, and keep it in the warm oven until dinner time.
The heat in Indian food comes from the use of red and green chilies. You can moderate it according to your taste by adding less. If you want to turn it up, add more!!
_____________
Suggestions for an Easy Valentine’s Day Menu
Cocktails
Your choice
Hors d’Oeuvres
Pick these up from an Indian Restaurant or an Indian grocery store. If you have a Trader Joe’s near where you live, they have them as well.
Mini samosas
Pakoras
Dinner
Kala Zeera Gajar Chawal (Black Cumin Carrot Pilaf)
Chicken Chatpata (Spicy Chicken)
Palak Allu Sabzi
Bread – Any kind of flatbread. Naan, Paratha, Roti /Tortilla. These are all available at the Indian Grocery Store, Whole Foods, or Trader Joe’s.
Dessert (Any or all)
Seviyan Kheer (Vermicelli Pudding)
Vanilla Ice Cream topped with Kesar Mango Pulp (These cans are available at the Indian grocery store).
I decided to try and grow green beans in my little garden plot. I researched planting and growing on the internet and followed all the tips to grow it in my planting zone. So I was excited when the beans started to sprout and grow. I even got enough to cook two lots of sabzi (sautéed vegetables) with them. Then we had an off-season heat wave which my poor bean plants succumbed to. Hopefully, I will have better luck next time.
Beans and potatoes are an easy vegetable to cook. You can use it in a wrap or serve it with dal, rice, and roti.
Hara Sem Allu Sabzi (Sautéed Green Beans and Potato)
Beans and potatoes are an easy vegetable dish to cook. You can use it in a wrap or serve it with dal, rice, and roti.
")
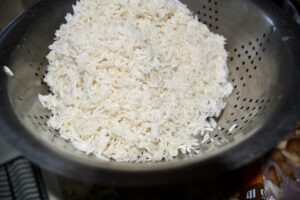
Next to wheat, rice is one of India’s leading food staples. Most dals and curries go well with plain boiled white rice. In India, a majority of households use plain cooked rice in their meals at least once during the day. There are different types of rice:
Short-grained—high in starch and tends to be sticky
Medium-grained—longer and a little chewy when cooked
Long-grained rice—less starchy with a firmer texture and excellent for pilafs.
The popular Basmati rice is a long-grained rice grown at the foothills of the Himalayas, both in India and Pakistan. It is mainly used for pilafs and Biryanis and has a nutty popcorn fragrance. The name Basmati originates from the Sanskrit word Vasmati which means fragrant.

Saada Ubala Hua Saphed Chavaal (Plain Boiled White Rice)
A leading food staple in India, most dals and curries go well with plain boiled white rice.
Ingredients
- 2 cups white Basmati rice
- 3¾ cups water
Instructions
- Place the rice in a medium bowl.
- Half-fill the bowl with water and wash the grains by gently sifting and rubbing the rice with your fingers. Do this at least 4 times.
- Now add enough water to the bowl just to cover the rice and let the rice soak in the water for 15 minutes. (You can skip the step if you are in a hurry, but add 4 cups of water when boiling).
- Rinse and strain the rice through a rice or fine strainer under running water.
- Transfer the rice to a medium pot and add 3¾-cups of water.
- Stir the rice and bring the uncovered rice to a boil on medium heat. It takes about 15-20 minutes.
- Once it comes to a rolling boil, lower the heat to low, stir gently, and cover the rice with a tight lid.
- Let it simmer on low for about 15 minutes. Try not to uncover the rice and stir at this stage, as it will allow the steam to escape, making the rice drier.
- Turn off the heat and let sit undisturbed for 5-7 minutes. Remove the lid and fluff the rice with a fork by gently lifting the rice up all around the pot, and-breaking up any clumps.
- Transfer to a serving bowl or dish when ready to serve.
- Plain boiled rice tastes good with any dal and any curried-style meats or vegetables. You can serve it as a meal with the usual array of pickles, raitas, papads, and chutneys.
Notes
Test for Doneness:
Crush a few rice grains against a flat surface to test for doneness. If it feels grainy, then the rice is not done. If that happens, sprinkle about a tablespoon of water over the rice and let it sit on low heat for 5 minutes. Or, you can place it in the oven at 180F temp for 10 minutes.
Stovetop and Oven Method:
Cook the rice on the stovetop in an oven-safe pot. Set your oven to 180 F. Once the water nearly evaporates and pits start forming on the rice's surface, turn off the heat and transfer the cooking pot to the oven. Let it bake for about 20 minutes until done.
Boiling Rice in Lots of Water:
 Another way to fix rice is to wash and rinse the rice as above. Then in a pot, add about 4 times the water as rice (1:4 ratio). Bring the rice to a boil on medium heat, then reduce the heat and let the rice cook for 15 minutes. Test the grain to see if it's almost done. Turn off the heat. Now strain the rice through a rice strainer or fine sieve. Be careful of the steam! When all the water is drained, give the sieve a shake and put the rice back into the pot Cover with a tight lid and let it sit for 15 minutes before you fluff it.
Most Indian households, when using this method of cooking rice, save the water that has essential minerals and nutrients to drink later. This is especially so in the southern states of India where "kanji' (rice water ) is used as an energy booster for its healthy nutrients.
When we were kids and had an upset stomach, Mama always gave us plain soupy boiled rice and plain yogurt with pepper and salt to settle our stomachs. I still do that to this day whenever anyone in the house has an upset stomach.
Before synthetic starches came on the market in India, this starchy water (kanji) was diluted and used by our dhobis (people who washed our clothes in the absence of washing machines) to starch cotton shirt collars, kurtas, saris, and cotton table linen.
Be aware that cooking times may vary in higher altitudes, and you may need to increase the water by about 1/4 ounce and the resting time by about 5 minutes more.
If you are using white rice other than Basmati, follow the cooking instructions on the packet. Also do this when you are using a manual or electric pressure cooker, microwave oven, or rice cooker.
Another way to fix rice is to wash and rinse the rice as above. Then in a pot, add about 4 times the water as rice (1:4 ratio). Bring the rice to a boil on medium heat, then reduce the heat and let the rice cook for 15 minutes. Test the grain to see if it's almost done. Turn off the heat. Now strain the rice through a rice strainer or fine sieve. Be careful of the steam! When all the water is drained, give the sieve a shake and put the rice back into the pot Cover with a tight lid and let it sit for 15 minutes before you fluff it.
Most Indian households, when using this method of cooking rice, save the water that has essential minerals and nutrients to drink later. This is especially so in the southern states of India where "kanji' (rice water ) is used as an energy booster for its healthy nutrients.
When we were kids and had an upset stomach, Mama always gave us plain soupy boiled rice and plain yogurt with pepper and salt to settle our stomachs. I still do that to this day whenever anyone in the house has an upset stomach.
Before synthetic starches came on the market in India, this starchy water (kanji) was diluted and used by our dhobis (people who washed our clothes in the absence of washing machines) to starch cotton shirt collars, kurtas, saris, and cotton table linen.
Be aware that cooking times may vary in higher altitudes, and you may need to increase the water by about 1/4 ounce and the resting time by about 5 minutes more.
If you are using white rice other than Basmati, follow the cooking instructions on the packet. Also do this when you are using a manual or electric pressure cooker, microwave oven, or rice cooker.")

I have invited family over for tea. I decide to give them heavy snacks so that they do not have to worry about dinner. To make it easy on myself, I order samosas from the local Indian Grocery store and fix Chole Batura myself. That along with some homemade Gulab Jamuns should complete the meal. I have several chole recipes I’ve used over the years, but decide to use one I morphed from several recipes. I am a little apprehensive, but the verdict was “Deeelicious!” I am very grateful for supportive and appreciative family!
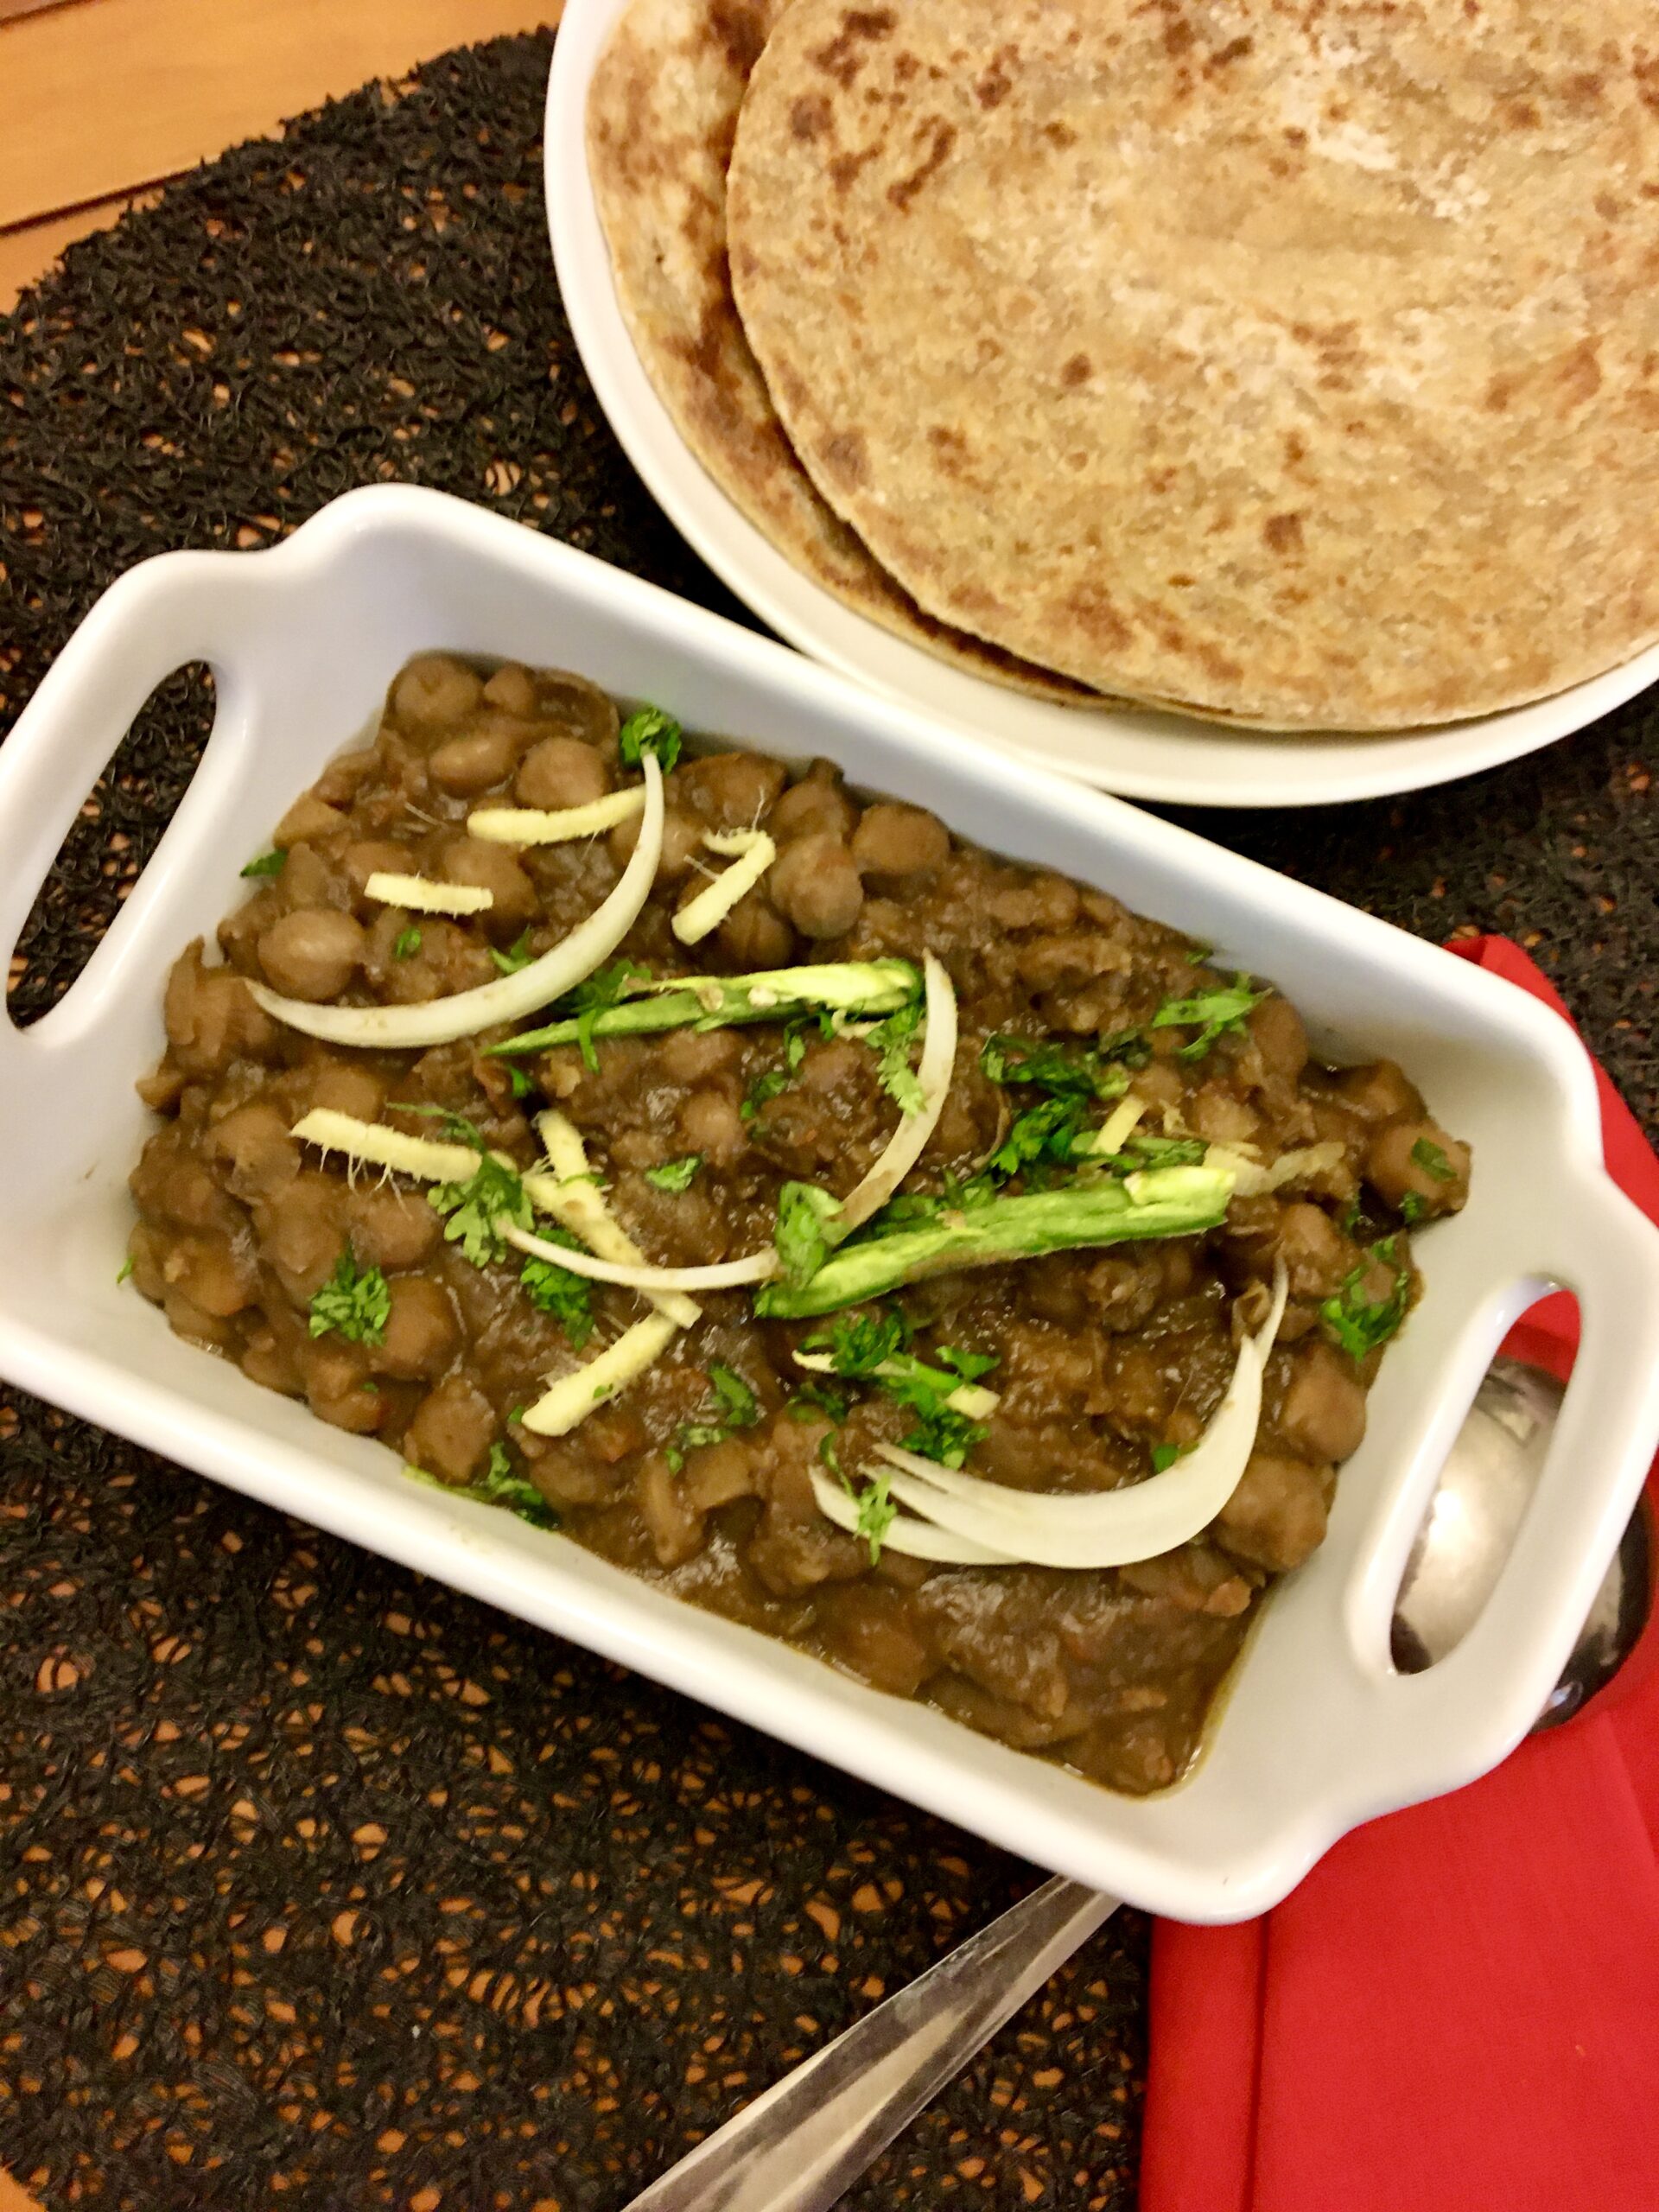
Amritsari Chole (Spicy Chickpeas Curry)
A traditional, Punjabi style mouth-watering chickpea curry that your mother-in-law would love!
Ingredients
- 2 cups Kabuli chana (chickpeas, garbanzo beans) (Sorted, cleaned, rinsed well, and soaked overnight in 5 cups water)
- 4 cups water
- 2 small cinnamon sticks
- 3 pods black cardamom
- 2 bay leaves
- 2 tsp cumin powder
- 2 tsp coriander powder
- 2 tsp mango powder Or dried pomegranate (available at your local Indian grocery store)
- 1 tsp red chili powder (optional, add more or less depending on your taste for spiciness)
- ¼ tsp baking soda (optional)
- 1 tsp garam masala powder (or to taste)
- ½ tsp salt (or to taste, more or less)
- 1 large (5-6 oz) onion (finely chopped)
- 1-2 fresh green chilis (slit in half or finely chopped to release the seeds into the curry—the seeds add the fire in your mouth sensation, optional, to taste)
- 4 medium tomatoes (finely chopped)
- 4 tbsp cooking oil
- 1 kettle hot water (keep handy to add as needed—I always keep a kettle of water hot water on hand when I cook)
Instructions
To Cook the Beans
- After soaking, rinse, and drain soaked beans and place them in a large pot. Add approximately 4 cups water of enough to cover over the beans, at least two inches.
- Add the whole spices, cardamom, cinnamon, bay leaf, ginger paste, baking soda (optional) and salt.
- Cover and boil on medium high for approximately 50 minutes until the beans are soft. If they start to dry out, add more hot water.
- Once the beans are cooked, remove from stove top, and set aside.
To Tadka / Tempering
- In a large pan or wok, heat the oil over medium heat, and add the chopped onions.
- Fry the onions until they are golden brown, Approximately 7-8 minutes.
- Optional: Add slit green chilies and fry for a minute.
- Add the chopped tomatoes and ginger and sauté until the tomatoes are cooked, and the oil starts to surface on sides of the pan, approximately 10-15 minutes.
- With a slotted spoon, carefully add the cooked chickpeas, but reserve the water (you can strain it ahead if you like).
- Sauté the chickpeas for about 5 minutes, and then add all the spice powders and stir for a minute.
- Now add the strained stock (add some hot water to the stock if it isn't measuring 3 cups of liquid). You need about 3 cups of liquid to continue cooking.
- Cover and simmer on medium low, stirring occasionally, until the gravy thickens.
- Uncover the pot and mash some beans against the inside sides of the pot to thicken the gravy. Check for salt. The finished beans should be soft and blended and a bit mushy, with a thick gravy. If the water dries out during cooking, add a little more hot water.
- Pour into a serving dish when done and garnish with any of the garnished items given.
- Serve with batura, naan, tandoori roti, or just samosas. You can also enjoy it with boiled rice or any kind of pilaf.
Notes
You can boil the chickpea beans with two black tea bags or two teaspoons of black tea leaves tied in a muslin cloth, if you want a dark color. Tea is caffeinated, so I leave it out in the interest of some of my siblings who are off caffeine.
You can add to or substitute the green chilies with one teaspoon of degi mirch (Kashmiri chili powder) if you want more of a reddish color. It packs some heat, so handle according to your taste!
If using a pressure cooker, boil the beans following the directions in the manual, but undercook it by 5 minutes, so you can finish cooking it on the stove top to the consistency you like.
If you do not want to hassle with soaking or boiling the chickpea beans, or are short on time, you can also replace the boiled and cooked beans with 4 cups of organic canned beans. Just rinse and drain them.
Golden Temple Photo by Laurentiu Morariu on Unsplash

I vaguely remember the first time I had Biryani. It was for a special celebration in Bangalore, South India at my grandparents’ home. I remember a houseful of mother’s relatives! For us kids, a large square Dari (cotton carpet) was spread on the floor. Fresh banana leaves, washed and cut into oblongs, were placed before us. Then the women in the family came around, serving us heaped spoons of Biryani. No utensils were provided, and we ate with our fingers (hands duly washed and using the tips of our fingers to scoop up the rice)! It was delicious! Mama always fixed it for New Year’s lunch with Channa Dal Curry and Raita. I continue the tradition when able!
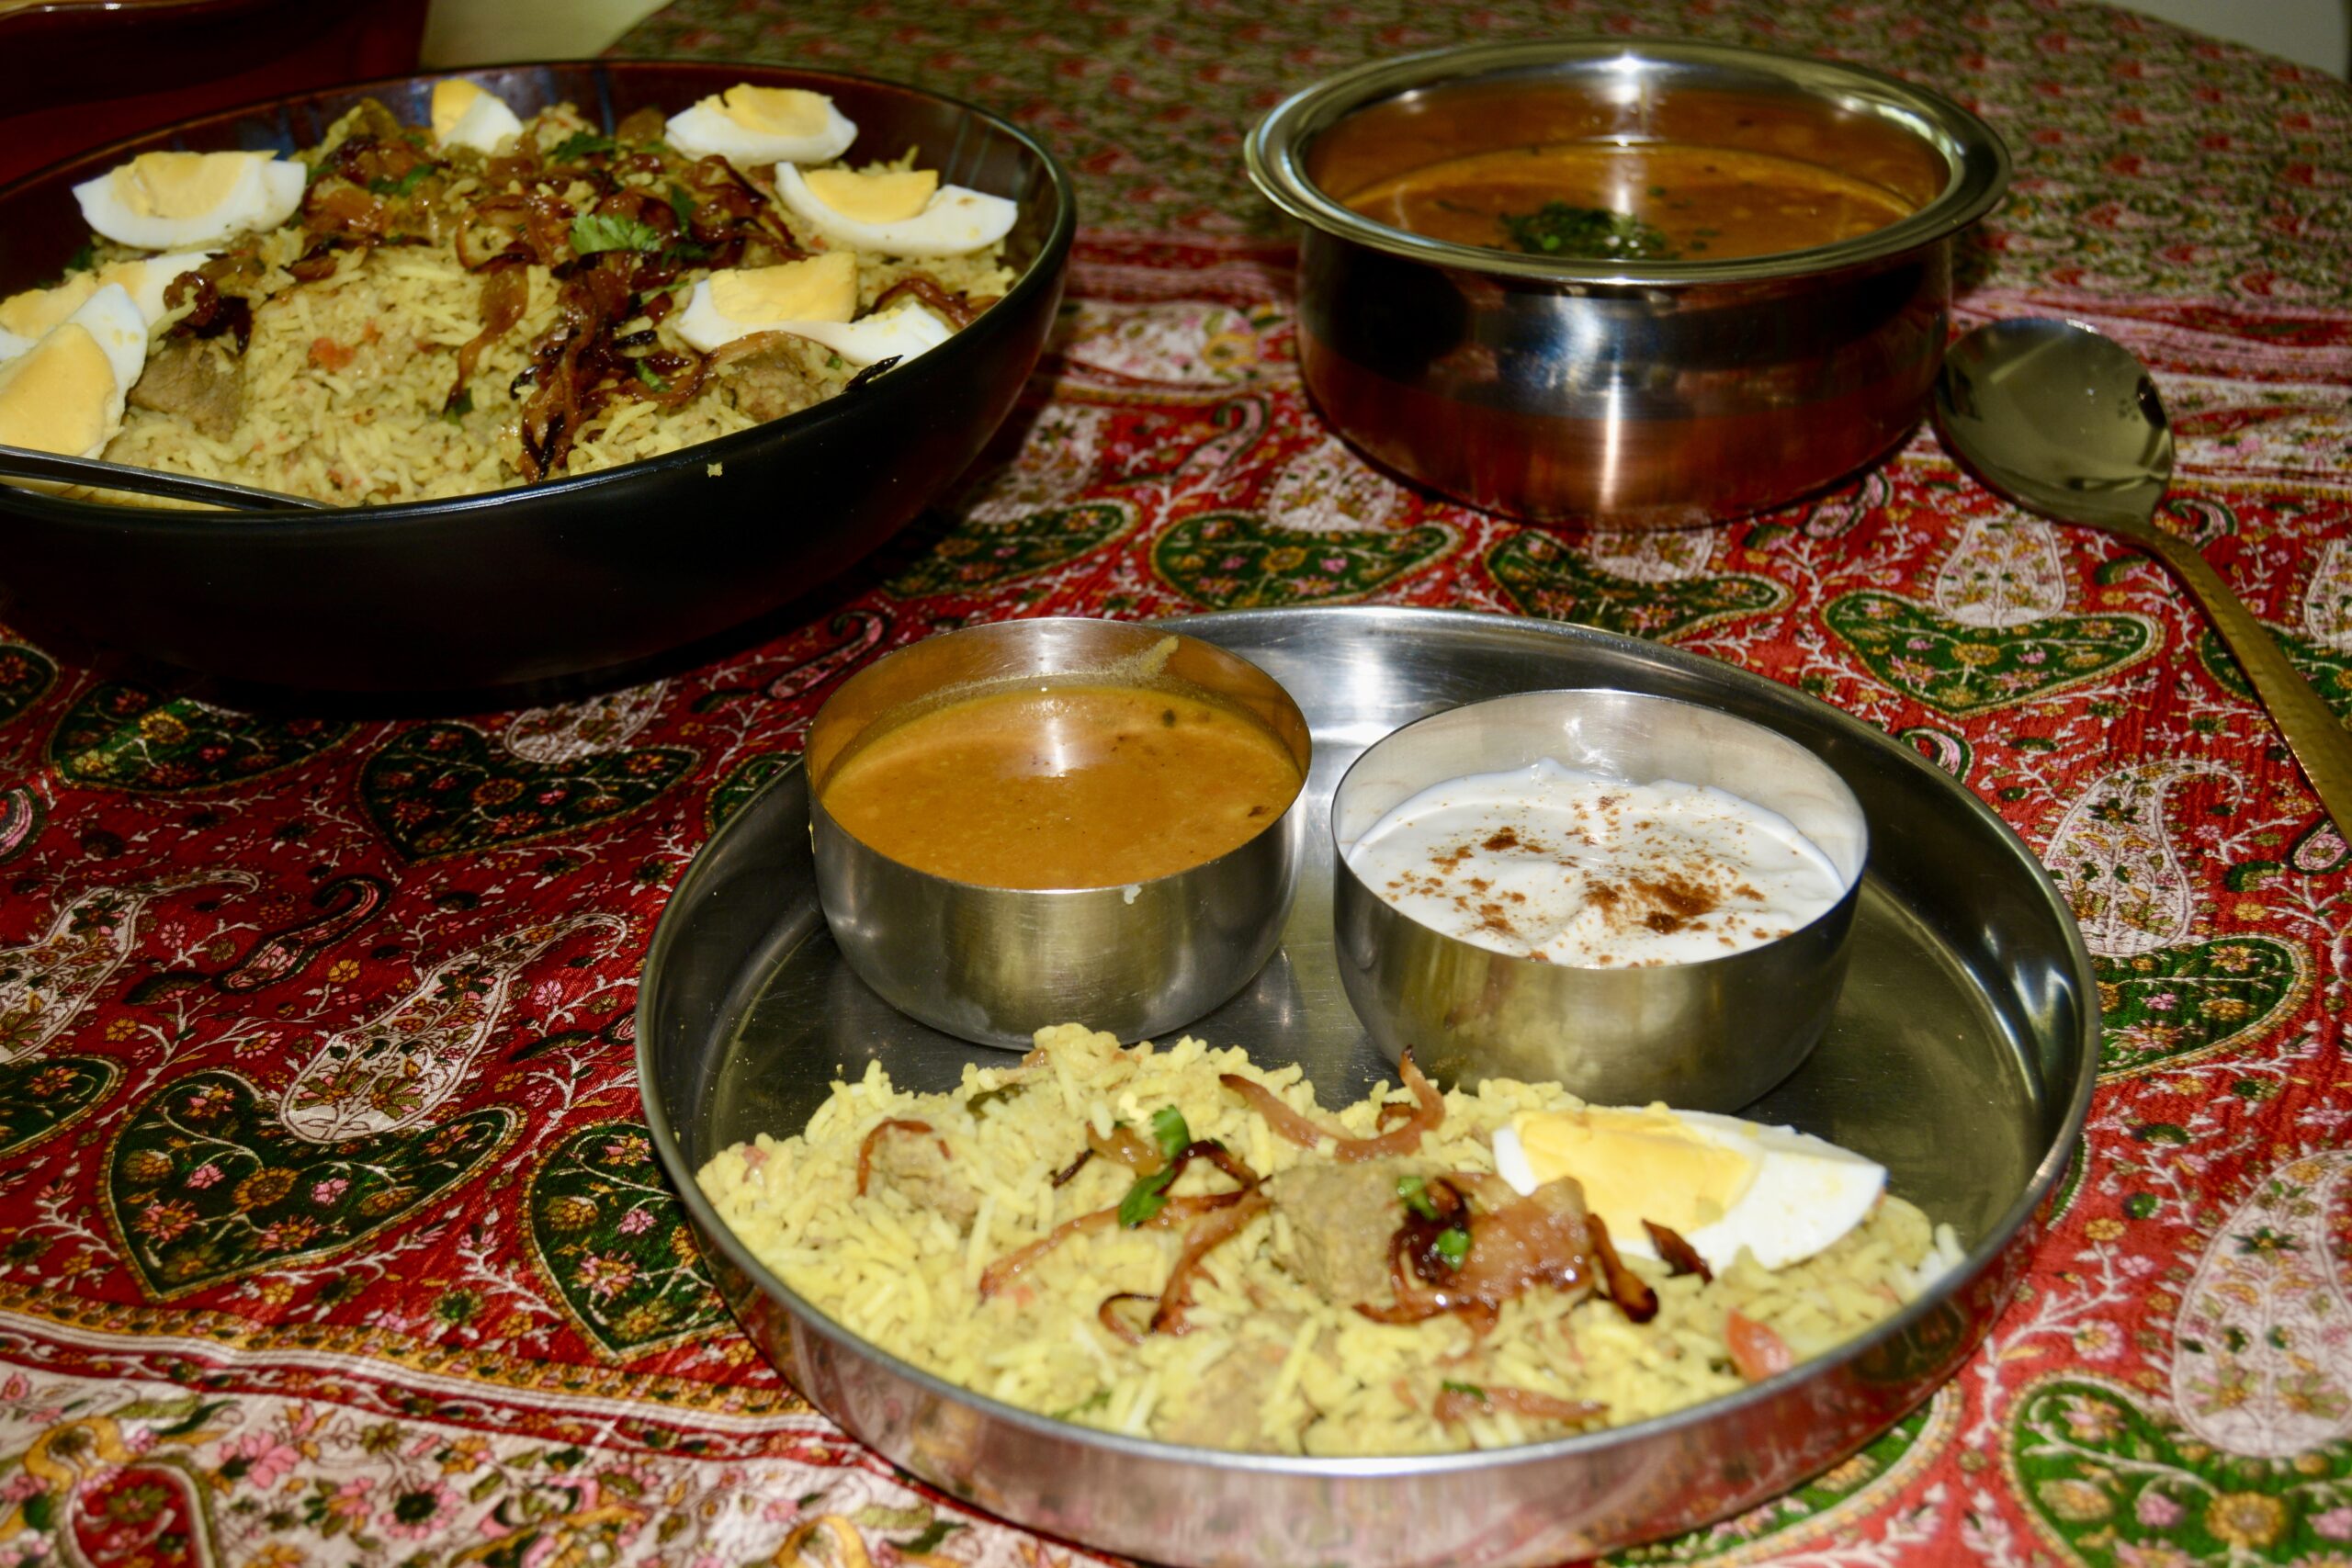
Mama's Biriyani
A mouth-watering, savory main dish brought to India by the Mughals.
Instructions
To Prepare
- Gather all the ingredients before you start. Wash and soak the 5 cups of rice for 15 minutes before you drain it.
- Heat ¾ cup of oil. You need extra when you make biryani.
- Add the cinnamon, cardamom, and cloves. Add cut onions and slit green chilies. When half fried (about 10 mins) add meat and salt to taste. Cook in its own juice for about 10-15 minutes until the meat is no longer pink.
- Add the ground ginger, garlic, spice powders, and green coriander. Fry until the masala is done. That is, until the water has evaporated and the oil starts to surface at the bottom of the pan. It takes about 10-15 mins.
- Now add enough water to cover and cook the meat until three-quarters cooked. (You can use a pressure cooker if you like but make sure the meat is not overcooked). When the meat is three-quarters cooked, and the oil starts to surface on top, remove the pan from the stove. Drain out the excess oil into a measuring cup or bowl. Set aside.
- Put the meat back on the stove. Add the beaten yogurt, tomatoes, coconut, and cook until you have a nice thick gravy, about 10-15 minutes. Remove from stove.
- To the excess oil you set aside, add the finely cut mint and juice of the lime. Set aside.
For the Rice
- Boil 10 cups of water (two cups water to one cup rice). When the water comes to a boil, pour the rice into the boiling water, and add the salt.
- Add the peas and carrots, if desired.
- When the is almost cooked, drain off all the water. (To test if the rice is almost cooked, remove a few grains and press on them between your finger tips. Most of it will feel soft, but should still feel grainy).
To Cook the Biriyani
- Turn oven on to 250°.
- In a large roasting pan or oven-safe pot, place a layer of rice, then a layer of the korma curry. Continue in this fashion until the korma is used. The last layer should be the rice. Now drizzle the oil, lime, and mint mixture all over the rice. Cover the dish and cook in oven for 20 minutes.
- Pull the roaster out of the oven, uncover, and with a fork gently toss the rice so it is blended well. Test if the rice is completely cooked. If it still feels grainy, then reduce turn the oven to 200° degrees and cook the rice until it is done.
Notes
Biryani is served with Channa Dal (Split Chick Pea) Curry and any raita of your choice.
Raita is yogurt mixed with any of the following, grated cucumber, grated coconut, or a fresh chopped blend of onion, tomato, green chili, and cilantro.
Making It Easy:
Sometimes I make it easy on myself and after making the korma, I just add the rice and the required amount of water. I learned this from a biryani recipe my eldest sibling makes. Just make sure you also take into consideration the amount of gravy when pouring in the water. If there is too much liquid, then the biriyani becomes a curried rice porridge!
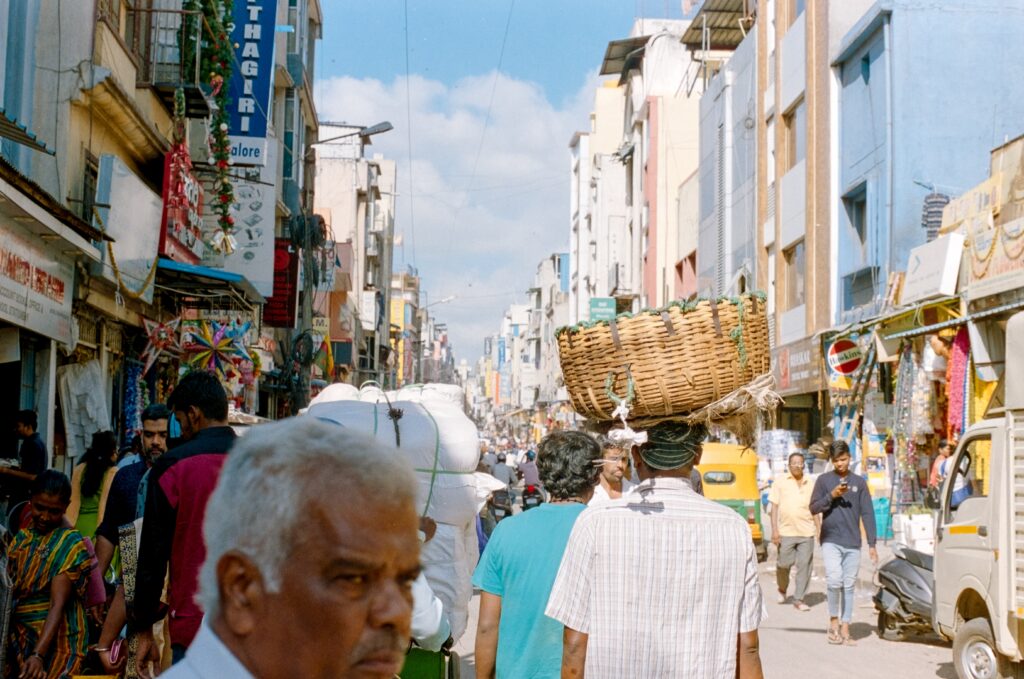
Streets of Bangalore Photo by Andrea Leopardi on Unsplash