Tag

indian

Browsing

It is 3.30 in the morning, and I quietly let myself out of the door so that I won’t wake the sleeping household. It is a freezing winter’s day in New Delhi, and I tug my long black uniform coat snug around me. The airline transport that just drove up will transport several of us who live in the area to the airline bus depot. We will wait until the other vehicles arrive, and then we will be shuttled to the airport in time for the 5:00 a.m. shift.

We arrive at the bus depot with half an hour to spare. The dhabba that serves at the canteen for the folks who work there is open. Several of us make our way to it. A cup of hot chai is just what we need to warm and wake us up. The owner is ready for us. He has been down this route every morning with the different groups on the morning shift. “Chai?” he asks. We nod, breathing in the wonderful aroma.

He pours out the hot tea simmering on the chula (mud stove) into the kulhars (handleless terra cotta cup). I watch, fascinated, as he froths the tea by pouring it from one kulhar to the other, keeping about 2 feet of distance between the two kulhars. Surprisingly, he doesn’t lose a drop. He hands me a kulhar. My frozen fingers around the warm kulhar with the steaming hot tea soon warms me up. I am now awake and ready to welcome the incoming passengers and aircraft.

Real Chai has to be aromatic, sweet, and milky, but you can adjust it according to your taste.

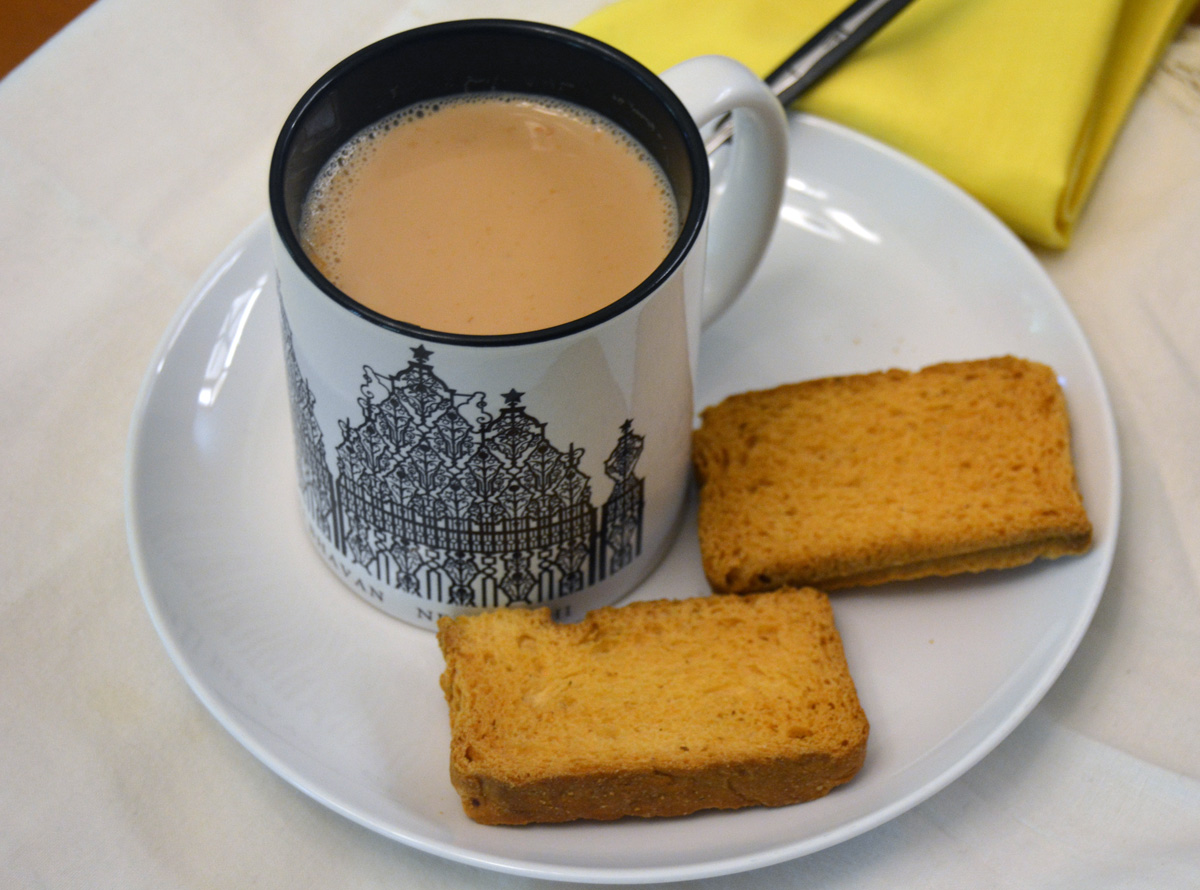
Chai: Indian Aromatic Tea

Prep Time 5 minutes
Cook Time 15 minutes
Total Time 20 minutes
Servings 2 servings
Calories 90
The authentic Indian tea classic. While real Chai has to be aromatic, sweet and milky, you can adjust this recipe according to your taste.

Ingredients

  • 2 cups whole milk (you can also use low fat if you are watching calories, or a vegan milk substitute)
  • 1 cup water
  • 2 tsp sugar (white or brown, according to your taste)
  • 2 teabags black tea (or 2 teaspoons of loose black tealeaves)
  • 2 green cardamom
  • 1/4 tsp cinnamon powder
  • 1/4 tsp clove powder

Instructions 

  • Crush the cardamom with a rolling pin. The top shell should come off easily. Bow crush the seeds as best you can. It does not have to be absolutely smooth.
  • Put all ingredients in a small pot and bring to boil. Lower heat and simmer for 3-4 minutes while you do a taste test. Add more spice accordingly. 
  • Pour into cups and sprinkle a bit of cinnamon or grate a little nutmeg on top.
  • Enjoy!

Notes

Some do not like the taste of crushed cardamom in their mouth while drinking chai. In that case, you can strain the chai and then serve it. Most Indians do not mind the cardamon as it serves as a breath freshener!
Milks: If you are lactose intolerant or vegan, you can use oat milk instead, or another vegan milk substitute. The flavour will be different but still delicious! If you're watching calorie intake, you can also use a low-fat or non-fat milk instead of whole milk.
 
Calories: 90kcal
Course: Drinks
Cuisine: Indian
Keyword: Tea

Indian Airlines Photo by Sean D’Silva
Kulhar Photo by Inspo on Unsplash

Kachumber is a chopped Indian style salsa that is used in lieu of salads. It is simple, healthy, and quick to prepare. Consisting of chopped fresh tomatoes, onions, cucumbers, and tossed with lemon or lime juice and seasonings, it is the perfect side dish to any Indian, Mediterranean, Mexican, or barbecue meal!

Kachumber (Indian Salsa)

Prep Time 15 minutes
Cook Time 1 minute
Total Time 17 minutes
Servings 4
Kachumber is a chopped Indian style salsa that is used in lieu of salads.

Ingredients

  • 1 medium red or white onion (finely chopped)
  • 1 medium tomato (finely chopped)
  • 1 medium Serrano chili (chopped fine, optional or red chili powder, to your taste)
  • 1 tbsp fresh cilantro (washed well and finely chopped)
  • salt and pepper (to taste)
  • juice of ½ lemon or lime (optional)

Instructions 

  • Place all the chopped ingredients in a mixing bowl. 
  • Optional, add the Serrano chili and toss into the Kachumber. You can substitute the Serrano chili for red chili powder (to your taste, of course!).
  • Add salt and pepper to taste. 
  • Toss gently together with a fork.
  • Transfer it to a serving bowl.
  • Garnish with chopped green cilantro, chili powder, pepper, or cumin powder.

Notes

Kachumber is a great meal to prepare ahead of time as it gives the dish time to soak in all the flavors.
I enjoy it with dal and rice, or as a side to tandoori chicken or tangy barbecue chicken.
Kachumber Raita
You can also add a cup or more (to your taste) of yogurt to the salad and make it into a raita. Omit lemon or lime juice if you are adding yogurt.
Chickpeas (Garbanzo Beans) Kachumber
You can also add cooked chickpeas and serve the kachumber on a bed of lettuce for a filling main-course salad and serve it with rotis. Or roll it into a wrap.
Course: Salad, Side Dish
Cuisine: American, Indian, Mediterranean, Mexican
Keyword: cucumber, kachumber, onion, salsa, tomato

One of my favorite meals is dal, plain boiled rice and pickle. While growing up, Mama had different dals for each day of the week. Each dal had its own seasonings, and we children had our own favorite dal.

Dals (including the larger legumes and beans) are a staple in the Indian diet. They are easy to prepare and add protein to vegetarian fare. The dals are mostly boiled with ginger and garlic and then tempered or seasoned (called Tadka, Baghar, or Chaunk) depending on which part of India you are raised. Dals taste great spooned over rice or eaten with rotis or any other flat bread.

I remember our Peace Corps friends, back in the 60s, said they survived on dal and rice until they got used to the other spicy food. There were no fancy restaurants in the villages and small towns where they worked, and with their meager salaries, lentils were cheap, wholesome and easy to prepare.

Dals (Lentils)

Prep Time 15 minutes
Cook Time 30 minutes
Total Time 45 minutes
Servings 6
Dals are a staple of Indian diet and are packed with protein and nutrients.

Ingredients

  • 1 cup lentils of choice
  • 4 cups water (or 6-7 cups, depending on dal)
  • 2 cloves garlic (chopped finely)
  • 1 tbsp fresh ginger (chopped finely)
  • 1 whole green Serrano chili (slit half-way)
  • 1 tsp tumeric powder
  • 1 tsp salt (or to taste)

For Tadka / Tempering

  • 2 tbsp cooking oil
  • 1 medium tomato (finely chopped, optional)
  • ½ onion (finely chopped)
  • 1 tsp garam masala (optional)
  • ½ tsp red chili powder (optional, or to your taste)
  • 2 tbsp fresh cilantro (finely chopped)

Instructions 

  • Sort and clean any grit in the dal. Rinse well. A friend, Lilani who is a fantastic gourmet chef, suggested washing and rinsing through a strainer so that any little bits of grit get washed away. But make sure you sort through the dal so you don't have any tiny stones that can crack someone's tooth!
  • Ina deep saucepan or cooking pot, add the dal, chopped garlic, fresh chopped ginger, whole Serrano chili or a whole dried red chili, turmeric powder, and salt to taste.
  • Add water and boil until it resembles a thick soup.
  • Stir every 15 minutes. Initially, the scum(froth) will rise to the top, you can remove it with a spoon. Half cover the pot with a lid so that some steam escapes and the dal water does not overflow.
  • Cooking time will vary from 45 minutes to 3 hours depending on the size and type of lentil.
  • Set aside and use any of the following ways to temper the dals.

Basic Tadka / Tempering for All Lentils

  • Heat oil in a small pan.
  • Add onions and sauté them until half browned. About 4-6 minutes.
  • Add tomatoes (if you like). Once they start to soften and curl, in about 3-4 minutes, turn off the heat and add the spice powders. Stir a minute or two and pour over the cooked dal.
  • Stir the dal and let the spices cook for another 3- 5 minutes to absorb the flavors of the tadka. Turn off the heat and let the dal rest for 5 minutes.
  • Pour the dal into a deep dish and garnish with chopped green Cilantro.
  • Serve with cooked white rice and a vegetable or a spicy meat dish and pickle.
  • The lentils are poured over the rice. If you are eating it with roti, flatbreads or bread, then pour the lentils into individual cup-sized dishes for easy dipping or the use of a spoon.

Notes

You can vary the seasoning by eliminating the onions or tomatoes and just season it with the spices.
I use different seasonings for different lentils, as you will see when you check my other dal recipes, but there are no hard and fast rules. The lentils should be the texture of a hearty soup, blended but not mushy.
Course: Main Course, Side Dish
Cuisine: American, Indian, Vegetarian
Keyword: dals, lentils

One of my favorite ways of eating corn!

Let me take that back, actually, this is tops in my book for eating corn.

I prefer the taste of it when it’s cooked on a charcoal grill, but I have also prepared it on a gas grill.

Back in India, we usually have vendors go around in their wooden carts with a small, homemade clay grill and a bunch of corn with husks stacked on the top of it. Whenever anyone wants to buy the corn, the low embers of coal are topped with more coal in the homemade clay or iron basin used as the grill. Some vendors even use a cut-out square of iron mesh on top to separate the corn from the embers. The husk and any corn silk is stripped from the cob. Using a piece of cardboard, the vendor fans the flames with one hand, while carefully rotating the corn to ensure that it’s cooked evenly. He then cuts a lime or lemon in half and rubs it all over the cob. A mixture of salt, pepper, red pepper, and sometimes black salt is then sprinkled on top and lightly rubbed in with the cut lime or lemon.

Yummy!


Corn on the Cob - Indian Style

Prep Time 5 minutes
Cook Time 10 minutes
Total Time 15 minutes
Servings 8

Equipment

  • 1 barbecue grill

Ingredients

  • 8 cobs corn
  • 1 lemon or lime (cut in half)
  • salt, red chili powder, and pepper (to your taste)

Instructions 

  • Shuck the corn (use only fresh, not frozen), and place the cleaned corn on top of the grill over medium heat.
  • Let the cobs sit until you hear the corn start to pop, about 8-10 minutes. With BBQ tongs, keep rotating the cobs. It chars a bit. The whole process should take less than 10 minutes. It takes longer if you're using a gas grill.
  • Now rub half cut lime or lemon all over the corn.
  • In a bowl, put a mixture of salt and pepper and some paprika or cayenne powder, if you like it spicy.
  • Dip the flat end of the lime in the mixture and rub it over the corn. The smoky flavor of the grilled corn combined with the tangy lime and spices is delicious.
  • If you do not like lime, then top it with butter and sprinkle the corn with salt and pepper and enjoy!

Notes

You can roast corn on a gas stove, but it takes much longer. I fare better using the gas stove with a perforated tortilla warmer, but it is messy and tedious.
Course: Side Dish, Snack
Cuisine: Indian
Keyword: corn, barbecue

Thank you for the beautiful photos:
Photo by Robert Krčmar on Unsplash
Photo by Andre Ouellet on Unsplash

Beef curry is cooked the same as any other meat curry, except it takes a little longer for the meat to tenderize. The cow being sacred in India, goat or lamb is used in place of beef. Out of respect for some of our Hindu Brahmin friends who did not like their vegan food cooked in the same pot as the meats, we separated the pots!

Since our social life always entailed hosting several large dinners a month (or even in a week), it was respectful to follow tradition rather than offend feelings and religious beliefs of those invited. Society in India is so closely knit that you never say, “I don’ t care.” You are brought up caring about not offending anyone!

Mama always cooked with goat meat and she would include a couple of marrow bones each time. The bones were small and made for a tastier gravy. Marrow in India is considered a high delicacy. With so many kids in the house we took turns getting a marrow bone! We would scoop the marrow out with a thin marrow spoon. It was always a treat.

I fix beef curry with boneless stew meat so I add some beef broth to get a richer tasting gravy.

Beef Curry

Prep Time 20 minutes
Cook Time 1 hour 15 minutes
Total Time 1 hour 35 minutes
Servings 6
A delicious, Indian-style stew with meat simmered in aromatic spices.

Ingredients

  • 1-1½ lbs beef stew meat (you can also use lamb or goat meat)
  • 2 medium onions (chopped very fine or use a food processor, but do not grind to a paste)
  • 1 tbsp garlic paste (can use bottled)
  • 1 tbsp giner paste (can use bottled)
  • 3 medium russet potatoes (peeled and cut in half breadth wise, optional)
  • ½ bunch cilantro (pick leaves and a bit of the stem, washed and chopped)
  • 2 tbsp tomato paste (or 6 oz can tomato sauce)
  • 4 tbsp cooking oil (canola, vegetable, corn, peanut)
  • 1 medium Serrano green chili (slit half-way down the middle, optional)
  • 2 cups hot water (for gravy)
  • 1 can beef broth (optional, you can use water instead)
  • ½ tsp salt (or to taste)

Whole Spices

  • 2 medium bay leaves
  • 5 pepper corns
  • 4 cloves
  • 1 large black cardamom
  • 2 small green cardamom (WholeSpices 2 bay leaves4-5 pepper corns4-5 cloves1 black cardamom2 small green cardamom1 small (1 inch) stick cinnamon)
  • 1 small cinnamon stick (about 1 inch stick)

Masalas (Spices)

  • ½ tsp tumeric powder
  • 1 tsp cumin powder
  • 2 tsp coriander powder
  • ¼ tsp red chili powder (optional)

Instructions 

  • Heat oil in a large (6 quart)cooking pot over medium heat.
  • Add whole spices and whole green chili. If you split the green chili mid-way down the center, it adds more heat to the curry. If you don’t want that,  just punch it once with a fork so it does not burst in the hot oil). Let splutter a few moments and then add onions. Sauté till onions are nearly ¾ brown stirring occasionally so that the onions don't burn around the edges  This should take about 8-10 mins.
  • Add beef. Braise well for about 5 minutes until the moisture evaporates and the beef is no longer pink.
  • Add ginger paste, garlic paste, and spice powders. Continue to sauté for an additional 5-8 minutes.
  • Add the tomato paste and half the cilantro. Cook, stirring frequently until most of the moisture is absorbed and the oil starts to rise on the edges of the pan. About 10-15 minutes. This is the most important part of getting a good tasty curry. It is called "bhuno" or braising.
  • Add the hot water, stock, potatoes, and let cook until the potatoes are done. Approximately 20 minutes.
  • Serve in a deep dish and garnish with remaining cilantro.
  • Serve with plain rice or any Indian-styled pilaf and any Indian-styled non-curried vegetable. It can also be eaten with rotis, pita bread, or tortillas. My husband enjoys dipping bread in the gravy!

Notes

You can make the gravy more or less by monitoring the water content, but don't make it thin and runny as it loses its flavor.
To cut cooking time you can boil or pressure cook  the meat till three quarter done and then cook the curry according to the recipe.
I like to use a manual pressure cooker or an Instapot. I cook everything directly in the pressure cooker. Sauté as indicated, then add the liquids and pressure cook the curry for about 5-8 mins. Pressure time will vary depending on altitude and the heat from your stove top so you will have to experiment! I then wait about 8 minutes to release the pressure. Now add the potatoes and cook it without pressure till the potatoes are done, about 10-15 minutes. I prefer it this way so that the potatoes don't get mushy in case the pressure is gets too much.  
 If you want to fix it in a Crock Pot, then once you finish the sautéing part, pour the sautéed meat, stock, cold water, and whole potatoes into the crock pot and cook on high for 4 hours or low for 8 hrs. Be sure to check in between to see the potatoes don't get overcooked and disintegrate!
Course: Main Course
Cuisine: Indian
Keyword: beef,, curry, spices