
")
Raitas are side dishes to Indian cuisine made out of yogurt mixed with fresh vegetables or boondi (a fried snack made from chickpea flour). Sometimes, cooked vegetables are added as well. Raitas compliment a meal, especially pilafs. They also taste good with dal and rice.
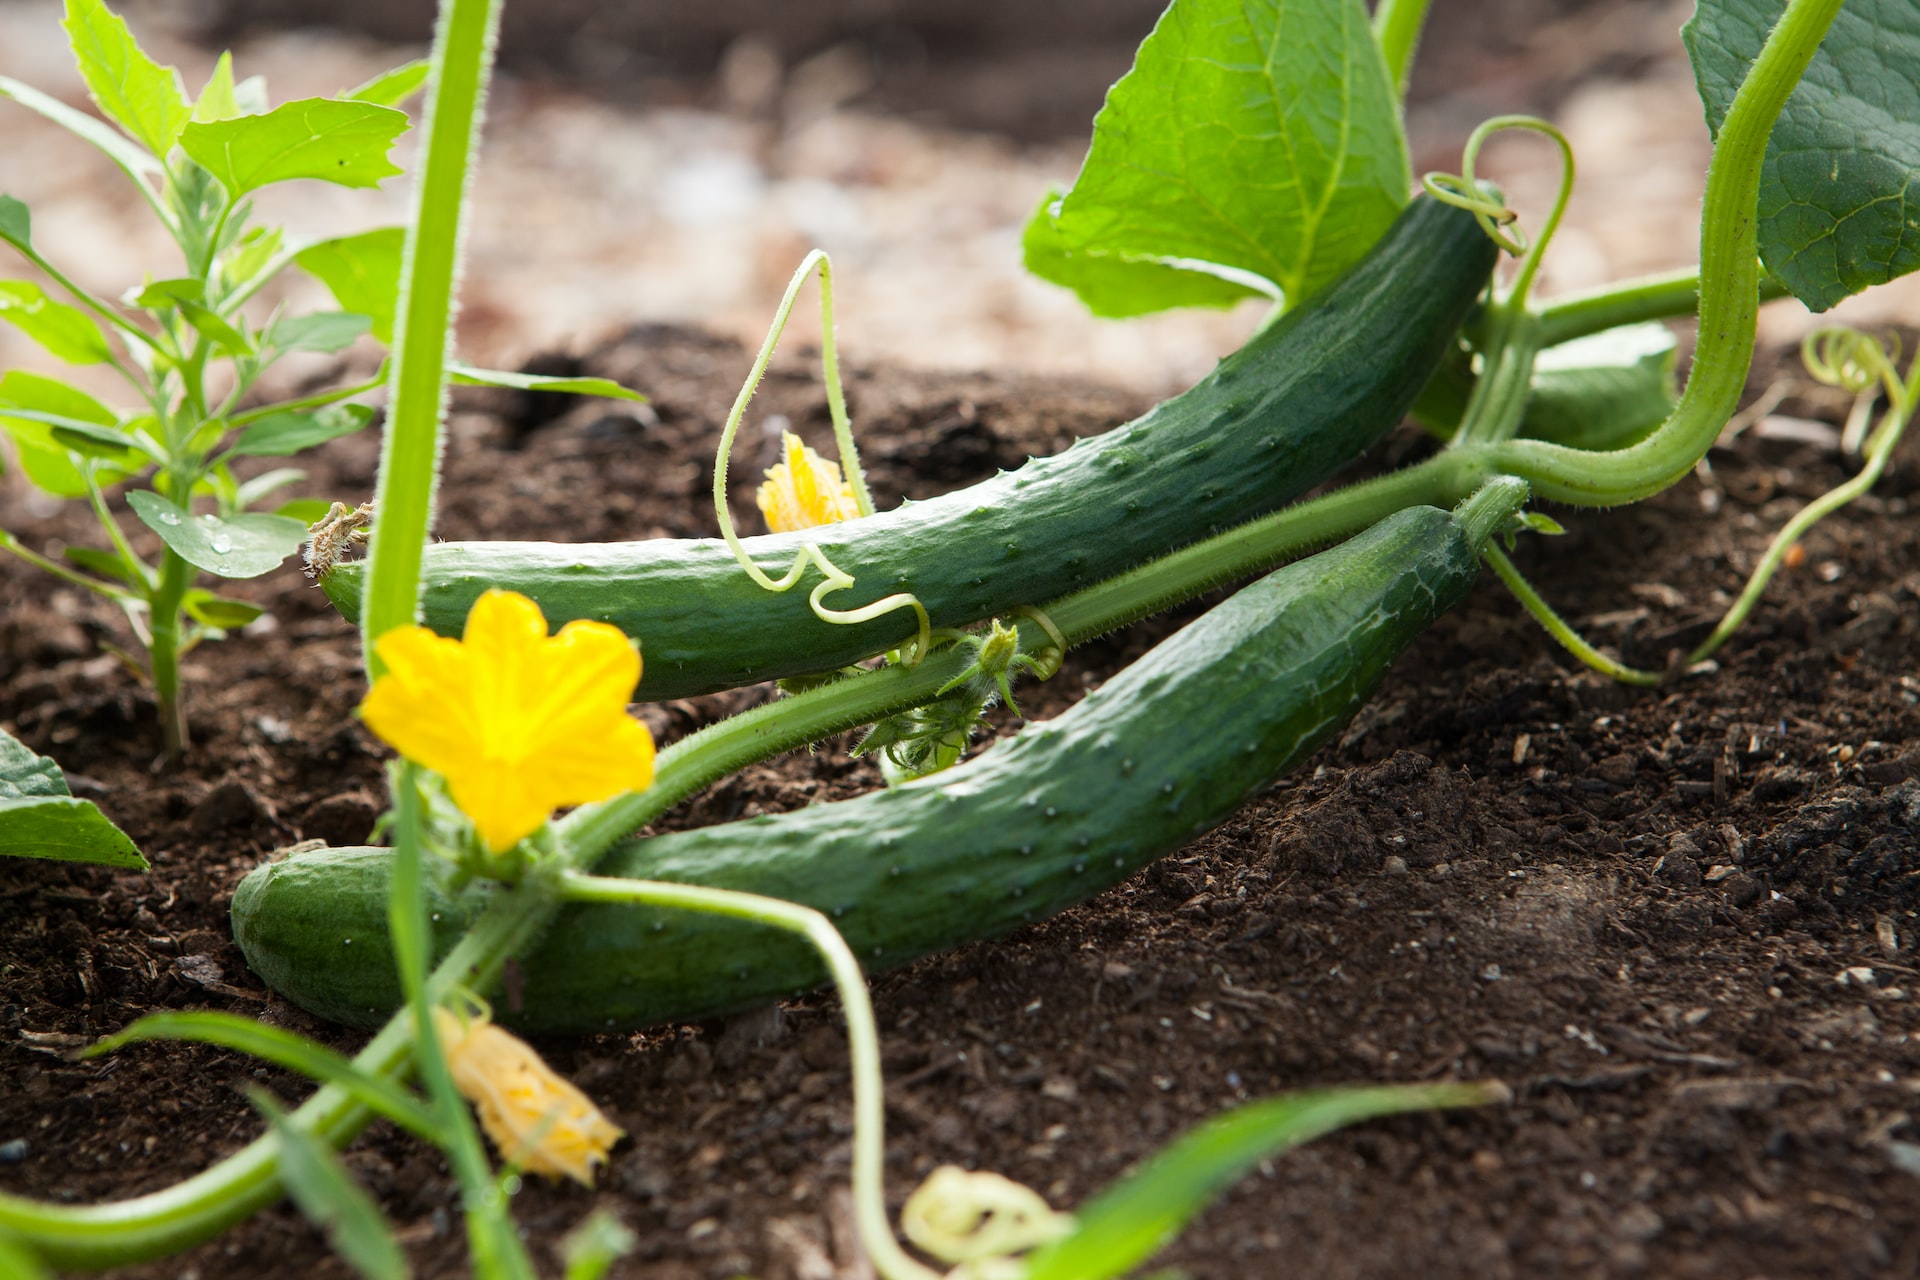
Kheera Raita (Cucumber Yogurt)
A refreshing, healthy yogurt sauce that goes well with any meal or as a great side to a barbecue. It can also be used as a salad or a dip.
Ingredients
- 2 cups plain yogurt (nonfat, fat free, or whole)
- 1 large cucumber, peeled and grated (use the large side of the grater)
- salt and pepper (to taste)
- ⅛ red chili powder (more or less totaste)
- ¼ tsp coriander powder (roaste)
Instructions
- Whisk the yogurt until it is smooth.
- Squeeze the excess water from the grated cucumber.
- Add the cucumber to the yogurt and mix together.
- Add the salt and pepper. Mix together.
- Pour into a serving dish.
- Sprinkle with chili powder and roasted cumin powder.
- Serve as a side to any Indian meal.
Notes
Thanks to Photo by Kelly Neil on Unsplash for the great photo of the cucumbers!
")
I was in the grocery store about a week ago, and they had fresh large cauliflowers on sale. Tempted by the price, I decided to buy two.
A week later, the second cauliflower is still accusingly sitting in the vegetable bin! I decide it is time to cook it before it gets rotten.
There are so many ways to cook a vegetable in India. By tweaking the masalas, you can create a new exotic dish. But how can you tell if it is good? When you sit down to eat with your family, their reactions are the final test of your creation!
So looking at the second cauliflower, I decide to morph a baked cauliflower recipe I have, but instead of baking the cauliflower, I will sauté it.
Tula Hua Gobi (Cauliflower Fry)
A delicious blend of cauliflower and spices to add to a healthy lifestyle. Works well for as a wrap, too.
Ingredients
To Prepare
- 8 cups water
- 1 head cauliflower
Ingredients
- 3 tbsp yogurt
- 1 tbsp ginger-garlic paste
- 1 tsp turmeric powder
- 2 tsp coriander powder
- 1 dried red chili (more or less, according to taste)
- ⅛ tsp garam masala
- ½ tsp ground or cracked pepper
- 1 tsp fennel seeds
- 1 medium onion (approximately 3 oz)
- 1 tsp salt (or according to taste)
- 3 tbsp cooking oil
- 1 tbsp fresh cilantro (chopped, for garnish)
Instructions
- Set a 6-quart pot with about 8 cups of water on medium heat and bring to boil.
- In the meantime, prepare the cauliflower. Remove the thick stem from the cauliflower. Since I am instilled with my mother-in-law’s 'no wastage' policy, I cut the thick fibrous outer portion and chop the soft inner part of the stem to add to the sabzi. (Incidentally, in India you can buy just a bundle of the stems to fix a sabzi).
- Separate the florets into bite-sized portions. Slice them in half if you have to.
- Wash the cauliflower well and add to the boiling water. Let it boil for 2-3 minutes, then drain.
- Note: If you have a microwave steamer, you can steam it for 1 minute.
To Marinate
- In a large bowl, add the cauliflower, yogurt, and spice powders, and toss well together. Set aside for 20-30 minutes.
To Season
- Heat the oil in a wok or deep saucepan on medium heat. Add the fennel seeds, stir for 15 seconds, and add the chopped onion. Sauté till half brown. Approximately 7-8 minutes.
- Add the masala-coated cauliflower and stir a few times. Lower the heat slightly. Cover and cook, occasionally stirring until the cauliflower is tender (about 7 minutes). You do not have to add any additional water while the cauliflower cooks, as it releases a lot of water during cooking.
- Uncover and cook another 3 minutes until the oil surfaces.
- Pour into serving dish and garnish with coriander leaves.
Notes
Works well for a wrap if you do not want to serve it as a side to a complete Indian meal.
")
My small kitchen garden has been bountiful this year, and the eggplants have been in abundance. I decide I will fix Baingan Bharta. The first time I tried to fix it was as a newlywed. Chachaji (my husband’s Uncle) and his wife (chachiji) were coming over for dinner. Not to digress, but in India, each family relationship is defined with a different term. Chacha refers to your dad’s younger brother, and his wife is called chachi. Ji is added out of respect.
Anyway, I decided to fix the dish from a recipe. The recipe called for large chunks of onions and tomatoes, which changed the flavor and texture of the traditional bharta. Chachaji and Chachiji were gracious enough not to comment on my initial culinary attempt!!
Our son was not much of a bharta fan. He never ate it at home, no matter how much I tried to persuade him to taste it. Then, on a visit to a friend in the neighborhood, he was forced (Indians don’t take no for an answer when it comes to eating!) to stay for dinner. Low and behold, there was the dreaded bharta on the table! He said he did his best to look like he was enjoying it, but concentrated on the dal!! We laugh at the memory. He still dodges it to this day.
Bharta tastes good with rice or roti. It also makes a good filling for a toasted sandwich or as a dip with corn chips.
But you have to like eggplant, of course!

Baingan Bharta (Roasted Mashed Eggplant)
A healthy side dish—roasted eggplant mashed with spices, and cooked tomatoes, and onions. Tastes good with roti, rice, in a sandwich, or even a dip with toasted bread triangles, wheat thins, or corn chips.
Ingredients
- 2 large eggplants (I prefer the Black Beauty variety—large oval shaped ones)
- 2 large onions (finely chopped)
- 4 medium tomatoes (diced)
- 1 tsp cumin powder
- ½ tsp chili powder (or to your taste)
- ¼ tsp garam masala (optional)
- 1 Serrano chili (finely chopped, optional)
- 2 tbsp fresh cilantro (finely chopped)
- 4 tbsp cooking oil
- ¾ tsp salt
Instructions
To Prepare
- Wash the eggplants and wipe them dry. Char them over a gas burner, broiler, or barbecue. Turn frequently and cook till the outer skin is charred, and the inside is cooked. About 25-30 minutes. The eggplant will collapse and get soft. This method gives it a wonderful earthy, smoky flavor.
To Cook
- On medium heat, heat oil in a wok or deep dish skillet. Add the chopped chili, give it a minute or two for the oil to be infused with the chili heat, add your onions, and sauté for 5-8 minutes until half-brown.
- Add the spice powders (and the garam masala if you use it). Stir a few times.
- Now add the tomatoes. Stir till all the ingredients are nicely blended. Approximately 3-4 minutes.
- Add the eggplant pulp and mix it well into the onion and tomato mixture. Cover and cook for 7-8 minutes, stirring occasionally.
- Uncover and add the fresh cilantro and garam masala. Cook uncovered, stirring a few times, until the oil surfaces on the sides. About 2-3 minutes. I usually add a tablespoon of desi ghee at this point, but you could add butter if you do not have desi ghee handy.
- Turn off and let sit 5 minutes before transferring to a serving dish. Garnish with chopped cilantro.
- Tastes good with roti, rice, in a sandwich, or even a dip with toasted bread triangles, wheat thins, or corn chips.
Notes
If you are short on time or unable to char the eggplants, use the microwave. Wash the eggplants, then prick them all over with a fork. Put them in a microwave roaster or if you do not have one, wrap each one individually in parchment or wax paper. Cook on high for about 5-8 minutes till it is cooked through. The eggplants will collapse and get soft. Wait for them to cool, and then slice the eggplants in half.
Scoop or scrape the inside flesh into a bowl and mash the eggplant coarsely. It should be semi-mashed with no large lumps. Discard the skin. If there are too many tiny seeds (as in mature eggplants), remove them, but there is no harm if some remain. If you have charred the eggplant, wash the burnt skin under a running tap, pat dry with a paper towel, and then semi-mash to prep it. You can also cut it up into chunks and then mash it with your spatula/spoon while cooking, but that is hard on the surface of your cooking pot.
If you prepped it in the microwave and want a smokey flavor, you can smoke it after it is cooked using charcoal smoking or the Dhungar method (the Rajputs used this).
The Dhungar Method: Take a small metal bowl and place it in the middle of the bharta in your serving dish. You can put a piece of aluminum foil under the bowl. Heat a small amount of coal until it fumes and flames. Put it into the metal bowl and pour a teaspoon of ghee over it. Cover the dish quickly. Leave it for about 5 minutes, and then remove the lid. Stir the bhurta and garnish with chopped cilantro leaves. I did try to use Liquid smoke once, but I'll leave that story for another time! Maybe it was the Hickory flavor. I probably will have better luck if I use a pure smoke flavor.
The Dhungar Method: Take a small metal bowl and place it in the middle of the bharta in your serving dish. You can put a piece of aluminum foil under the bowl. Heat a small amount of coal until it fumes and flames. Put it into the metal bowl and pour a teaspoon of ghee over it. Cover the dish quickly. Leave it for about 5 minutes, and then remove the lid. Stir the bhurta and garnish with chopped cilantro leaves. I did try to use Liquid smoke once, but I'll leave that story for another time! Maybe it was the Hickory flavor. I probably will have better luck if I use a pure smoke flavor.

While in the military, Dad was transferred to Dehradun, set at the foot of the incredible Himalayas ranges. The large old colonial home we lived in for several years was spread over 3 acres. We had an abundance of mango and other fruit trees—and great adventures!
As kids, we enjoyed a whole lot of climbing trees and playing Tarzan. Dad even had a hen house built, and with domestic help, raised Rhode Island red hens and Leghorns. The hired help who lived on the premises took care of it all, so it was a breeze for our family. The house had stables and beautiful stalls. During colonial times, the British must have housed their horses and carriages there. Since the horse and buggy days were over, Dad decided to get a cow and Indian buffalo in place of horses.
There was always milk in abundance, and when the mangos were still raw, I remember Mom would make delicious Mango Fool during the hot summer season. Our house was always a magnet for the kids around the block, so she always had an enamel bucket of mango fool ready for us when we got hot and thirsty.
Now, looking back, I am amazed how Mom was able to feed the many!
A fool is a delicious combination of fruit and milk, but the Mango Fool Mom made was out of this world. It was a drink and not the usual dessert.
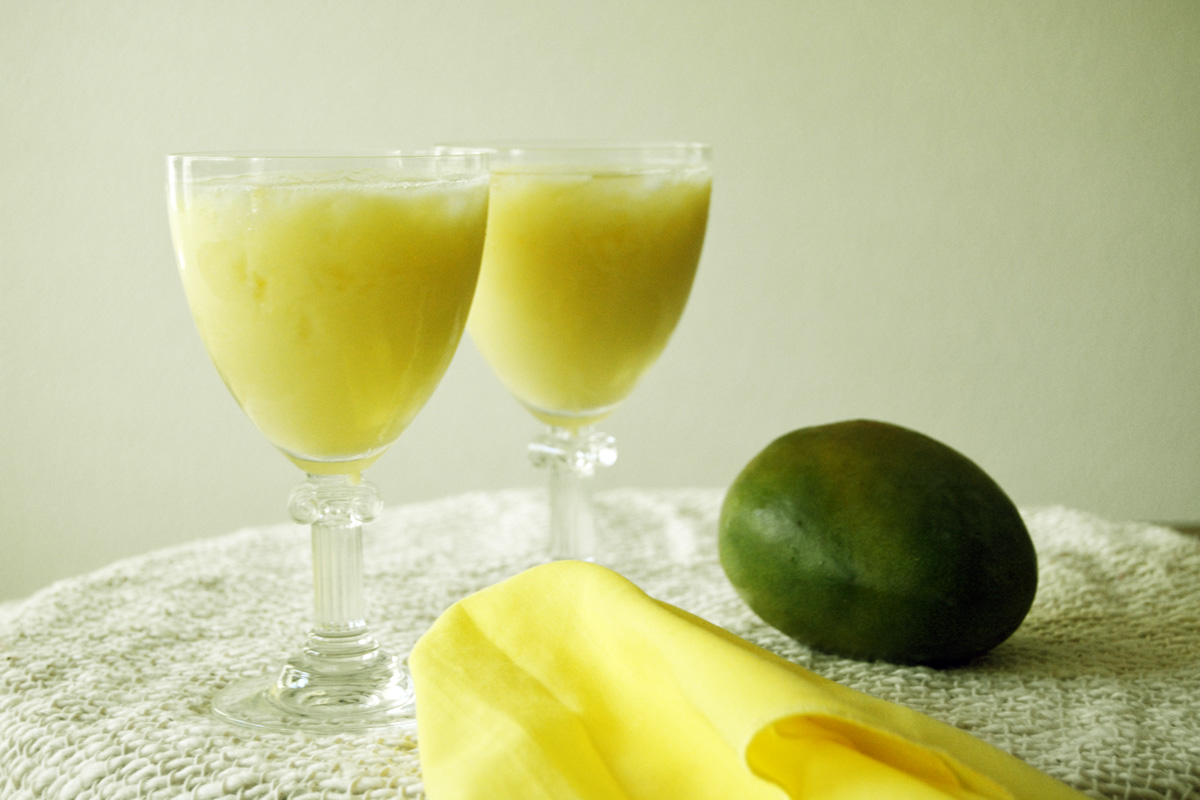
Mango Fool
A fool is a delicious combination of fruit and milk, but the Mango Fool Mom made was out of this world. It was a drink and not the usual dessert.
Ingredients
- 6-8 medium raw mangoes (half raw will also do)
- ¾ cup sugar or to taste
- 3 cups water
- 3 cups chilled milk
- 1 cup crushed ice
Instructions
- Wash and peel the mangoes.
- Boil the peeled mangoes with water and sugar until they are tender. Approximately 20 minutes. Leave to cool.
- Squeeze out the pulp and discard the seed.
- Blend in an electric blender until smooth. If the mangoes you use have threads, strain them through a fine muslin cloth or mesh strainer.
- Chill the mixture until needed.
- When ready to serve, mix the mango mixture with the chilled milk.
- If it tastes too tart, add more sugar or milk to your taste.
- If the mangoes are starting to ripen, they should be sweet enough.
- Pour a quarter cup of crushed ice into tall glasses. Pour the mango fool in and serve with a sprig of fresh mint.
- A cool and refreshing drink for summer!
Notes
Note: This can be made with tart apples as well.
")
We are visiting my mother-in-law. Sitting on the large top floor balcony, we are enjoying cups of hot chai in the early morning cool. The house used to be a single-level home but when my mother-in-law retired, Mummy built a complete top floor with its own entrance where she lives. The first floor apartment is rented out to a family and our son is busy downstairs playing with their kids.

The vegetable vendor is passing by on the street alongside the house. He walks a few steps yelling “Karela, gobi, allu, bhindi, etc.,” to entice the housewives to purchase the vegetables. Mummy calls to the vendor, he enters the premises, right under the balcony, so she can spot-check all the veggies on the cart.
Finally, the vegetables are selected and a round of bargaining ensues until both of them are satisfied. Then, to our amusement, my mother-in-law lowers a basket attached to a rope down to the vendor. He puts the vegetables in, she draws it up and sends the money down for payment. We are awed by her ingenuity!
“See” she says, “now I can make your favorite karela.” She hands them to me, so I can go scrub and wash them. We both sit outside and prep the karela to cook later.
The Indian variety is smaller, more pointed and ridged than the Chinese variety. For this recipe, I prefer the Indian variety.
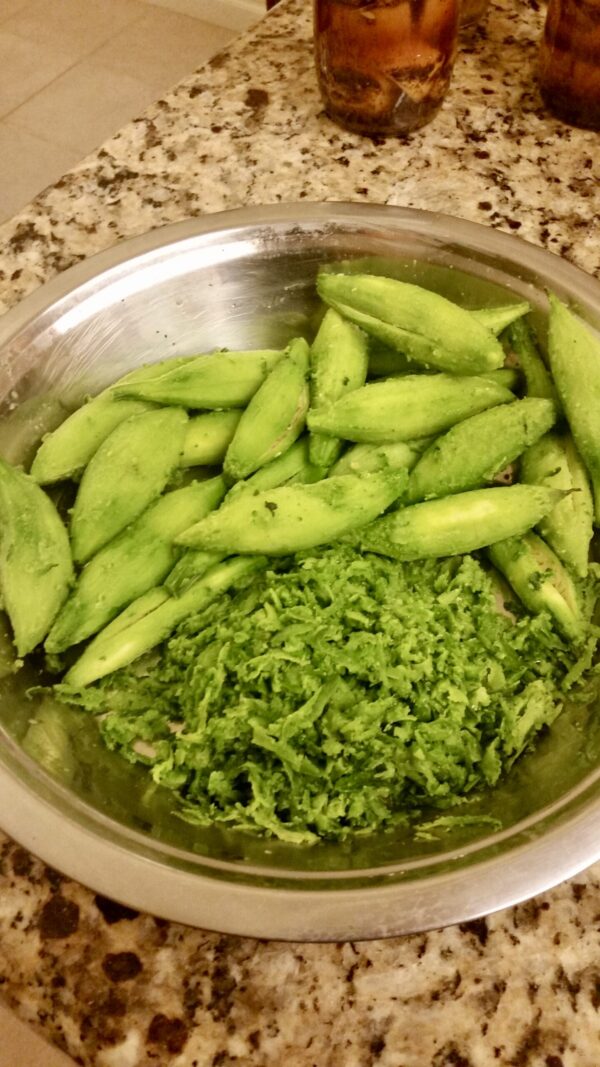
Karela Sabzi (Spiced Bitter Gourd)
A dish you won't be able to refuse—bitter gourd mixed with onions, tomatoes, and spices!
Ingredients
- 12 small karela (choose the smaller, thinner ones)
- 1 tsp salt
- ½ tsp red chili powder (or to taste)
- 1 tsp cumin powder
- ¼ tsp tumeric (optional)
- ¼ tsp garam masala
- 2 medium onions (diced)
- ¼ cup cooking oil
Instructions
To Prepare Karela
- Scrub the karela with a brush. Pat dry, then scrape and save the top ridged skin (chilka) in a utensil.
- When the skin has been nicely scraped off, salt the karela and the skins separately (about 1 teaspoon of salt, each) and set aside for at least one hour. The longer it brines, the less bitter it will taste.
- After an hour, squeeze as much of the juice out of both the karela and the skins.
- Save the juice, dilute with water and drink it. It is a good blood purifier and help slower blood sugar–but it tastes awfully bitter!!
To Cook
- Slit the brined karela through the middle on one side and remove any hard seeds.
- Dice the onions, but not too finely.
- Heat oil in a large wok or heavy bottomed pan. Add in the karela carefully to avoid spluttering. It might be a good idea to use a splatter guard. Sauté until nicely dark brown all over. You will have to stir them from time to time. This should take about 10 mins.
- Set aside the sautéed karela on a paper towel to drain the excess oil.
- In the remaining oil in the pan (add a little more if you have to), add the karela skins and sauté till nicely browned.
- Add the chopped onions and stir-fry for another 5-8 minutes.
- Now mix in the fried karela and masalas and let them cook together for another 2-3 minutes. Taste for salt, although I doubt you will need to add any—unless you are like me!! Stir a few more times, and you are done.
- Spoon into a dish, and it is ready to be served.
- Best eaten with rotis or as a side dish with rice and dal.
Sabzi vendor photo credit: Gert-Jan Stads / International Food Policy Research Institute
")

It is summer. Dad is stationed at Srinagar, Kashmir, and we are taking a road trip in a military transport to join him for our summer vacation. It is a long and arduous trip in the hot, sweltering heat across the northern plains of India. The canvas flaps on the sides of the truck are rolled up slightly to allow for some air.
Finally, we start to climb into the mountains. The air starts to get cooler. We climb higher. Now, it starts to really cool down. The two jawans (soldiers) escorting us on the trip pull down the canvas flaps, and tighten them all around, so the cold breeze is blocked. It is dusk. We reach the highest point of our journey which is a little township (if you can call it that) called Kud, and park outside the Dak bungalow (a government building, a relic from the British Raj used as rest houses).
We pile out of the truck. It is unexpectedly windy and freezing. We had not anticipated the cold and still have our jackets in the suitcases. Kud is a little over 6,000 feet in elevation, but the summer heat of the plains was still in our brain. The two younger siblings, shivering in their short cotton dresses, grab what they can of Mama’s sari palla (scarf portion of the sari), and try and wrap themselves in it. We, older ones, in our salwar and kurta, are slightly better off. A junior officer is waiting and hurries us into the Dak bungalow where a fire is burning in the marble fireplace in the drawing room. Oh, the bliss of thawing out! We are served hot chai and cookies.
Dinner is served within an hour. Allu Poori (or Allu Tak as we call it), accompanied by hot puffed pooris. It is delicious. The memory of it still stays with me.
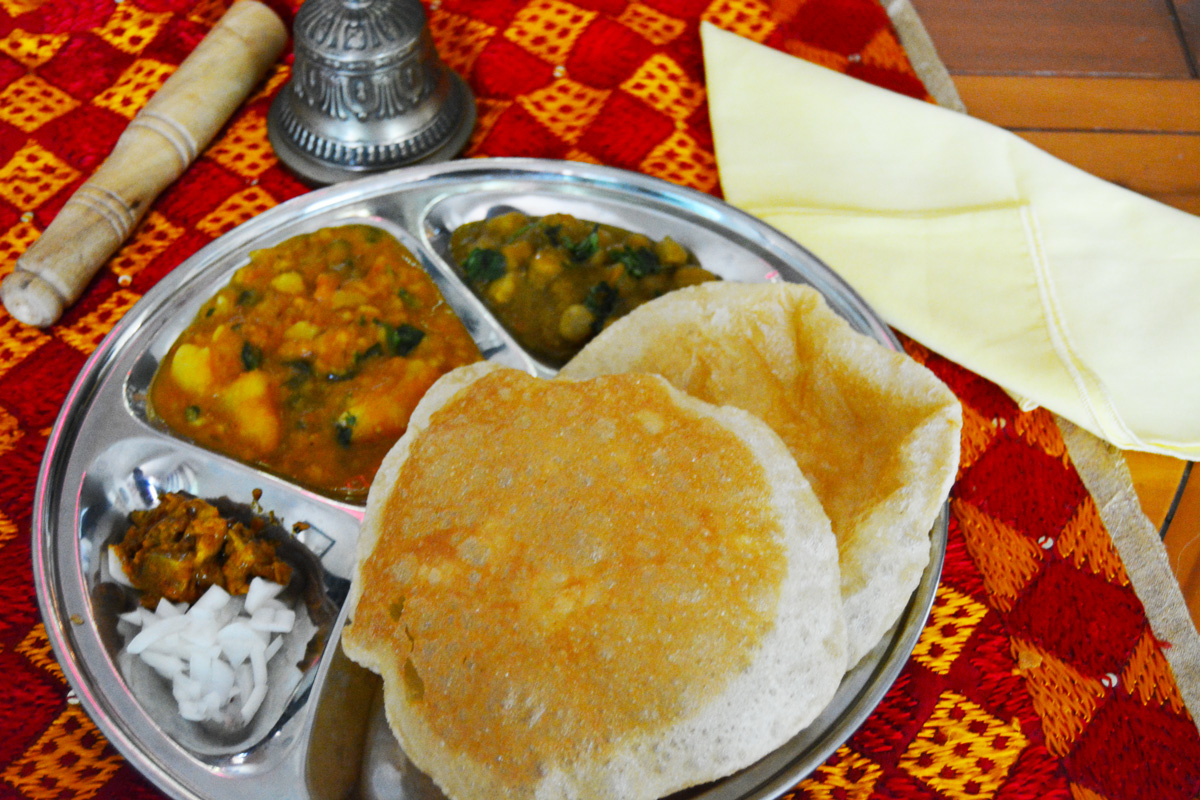
Allu Poori (Curried Potatoes)
Allu poori is boiled potatoes tempered with whole cumin seeds and spices in a tomato sauce that goes with pooris, a deep-fried Indian flatbread.
Ingredients
- 6 medium potatoes, boiled, peeled, and diced into bite sized cube
- ¼ cup yellow onions or shallots chopped fine
- 1 tsp fresh ginger chopped
- ¼ tsp chili powder or to taste
- ¼ tsp turmeric powder
- 1 tsp cumin powder (or ½ teaspoon cumin seeds)
- 2 tbsp tomato paste (or 3 fresh tomatoes chopped fine or puréed)
- 2-3 tbsp cooking oil
- 1 small or medium green chili (jalapeño), whole or chopped (optional)
- 3 cups hot water (approximately)
- 1 tsp salt or to your taste
- ¼ tsp garam masala (optional)
Instructions
- Heat oil in a deep skillet or wok. Toss in cumin seeds, stir for 30 seconds.
- Add the green chili and ginger, stir for 30 seconds.
- Add the onions and sauté for 3-5 minutes until they start to turn slightly brown.
- Add turmeric, chili, and cumin powders.
- Stir the powders for less than 30 seconds, and then add the tomato paste.
- Cook for about 2-3 minutes to get the raw taste of tomatoes out. If using fresh tomatoes, cook until they turn pulpy, approximately 10-15 mins.
- Now add the potatoes into the onion-tomato spice mixture and add approximately 3 cups of water.
- Add salt. Give the mixture a nice stir, then cover, and bring to a boil.
- Simmer for 10 minutes.
- Uncover and with the back of your spoon mash some of the potatoes up against the sides of the pan to get a thickish gravy.
- Monitor the water you add. The gravy has to be a thick gravy and not watery. If it gets too thick you can add more water, if too thin, uncover and cook until it thickens
- Turn off heat and let sit 5 -10 minutes.
- Pour into a serving dish and garnish with chopped cilantro and sprinkle with garam masala
- Serve with pooris, pita bread, tortillas or parathas. This dish goes well with any kind of flat bread.
Notes
Garnish: 1/4 cup fresh green cilantro {coriander} washed and chopped fine. Use more of the leaves and discard most of the stalks (or save the stalks for dals or soups).
Srinagar Photo by SOURAV BHADRA on Unsplash