")
In India, it was not uncommon for friends or fellow officers in the military services to drop in for drinks after the usual tea time of 4.30 or 5.30 p.m. Drinks, of course, were like a cocktail hour, so one always had the bar or pantry stocked. Then, there was the namkeen (salty snack) that went with it. Invariably, the cocktail hour would extend into dinner time!
Indian hospitality being what it is, it is customary to have your guests stay on for dinner, so it is good to know recipes that can be fixed quickly to expand the food on the table.
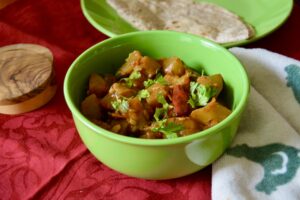
This spicy and tangy potato recipe is a quick and easy addition to any meal.
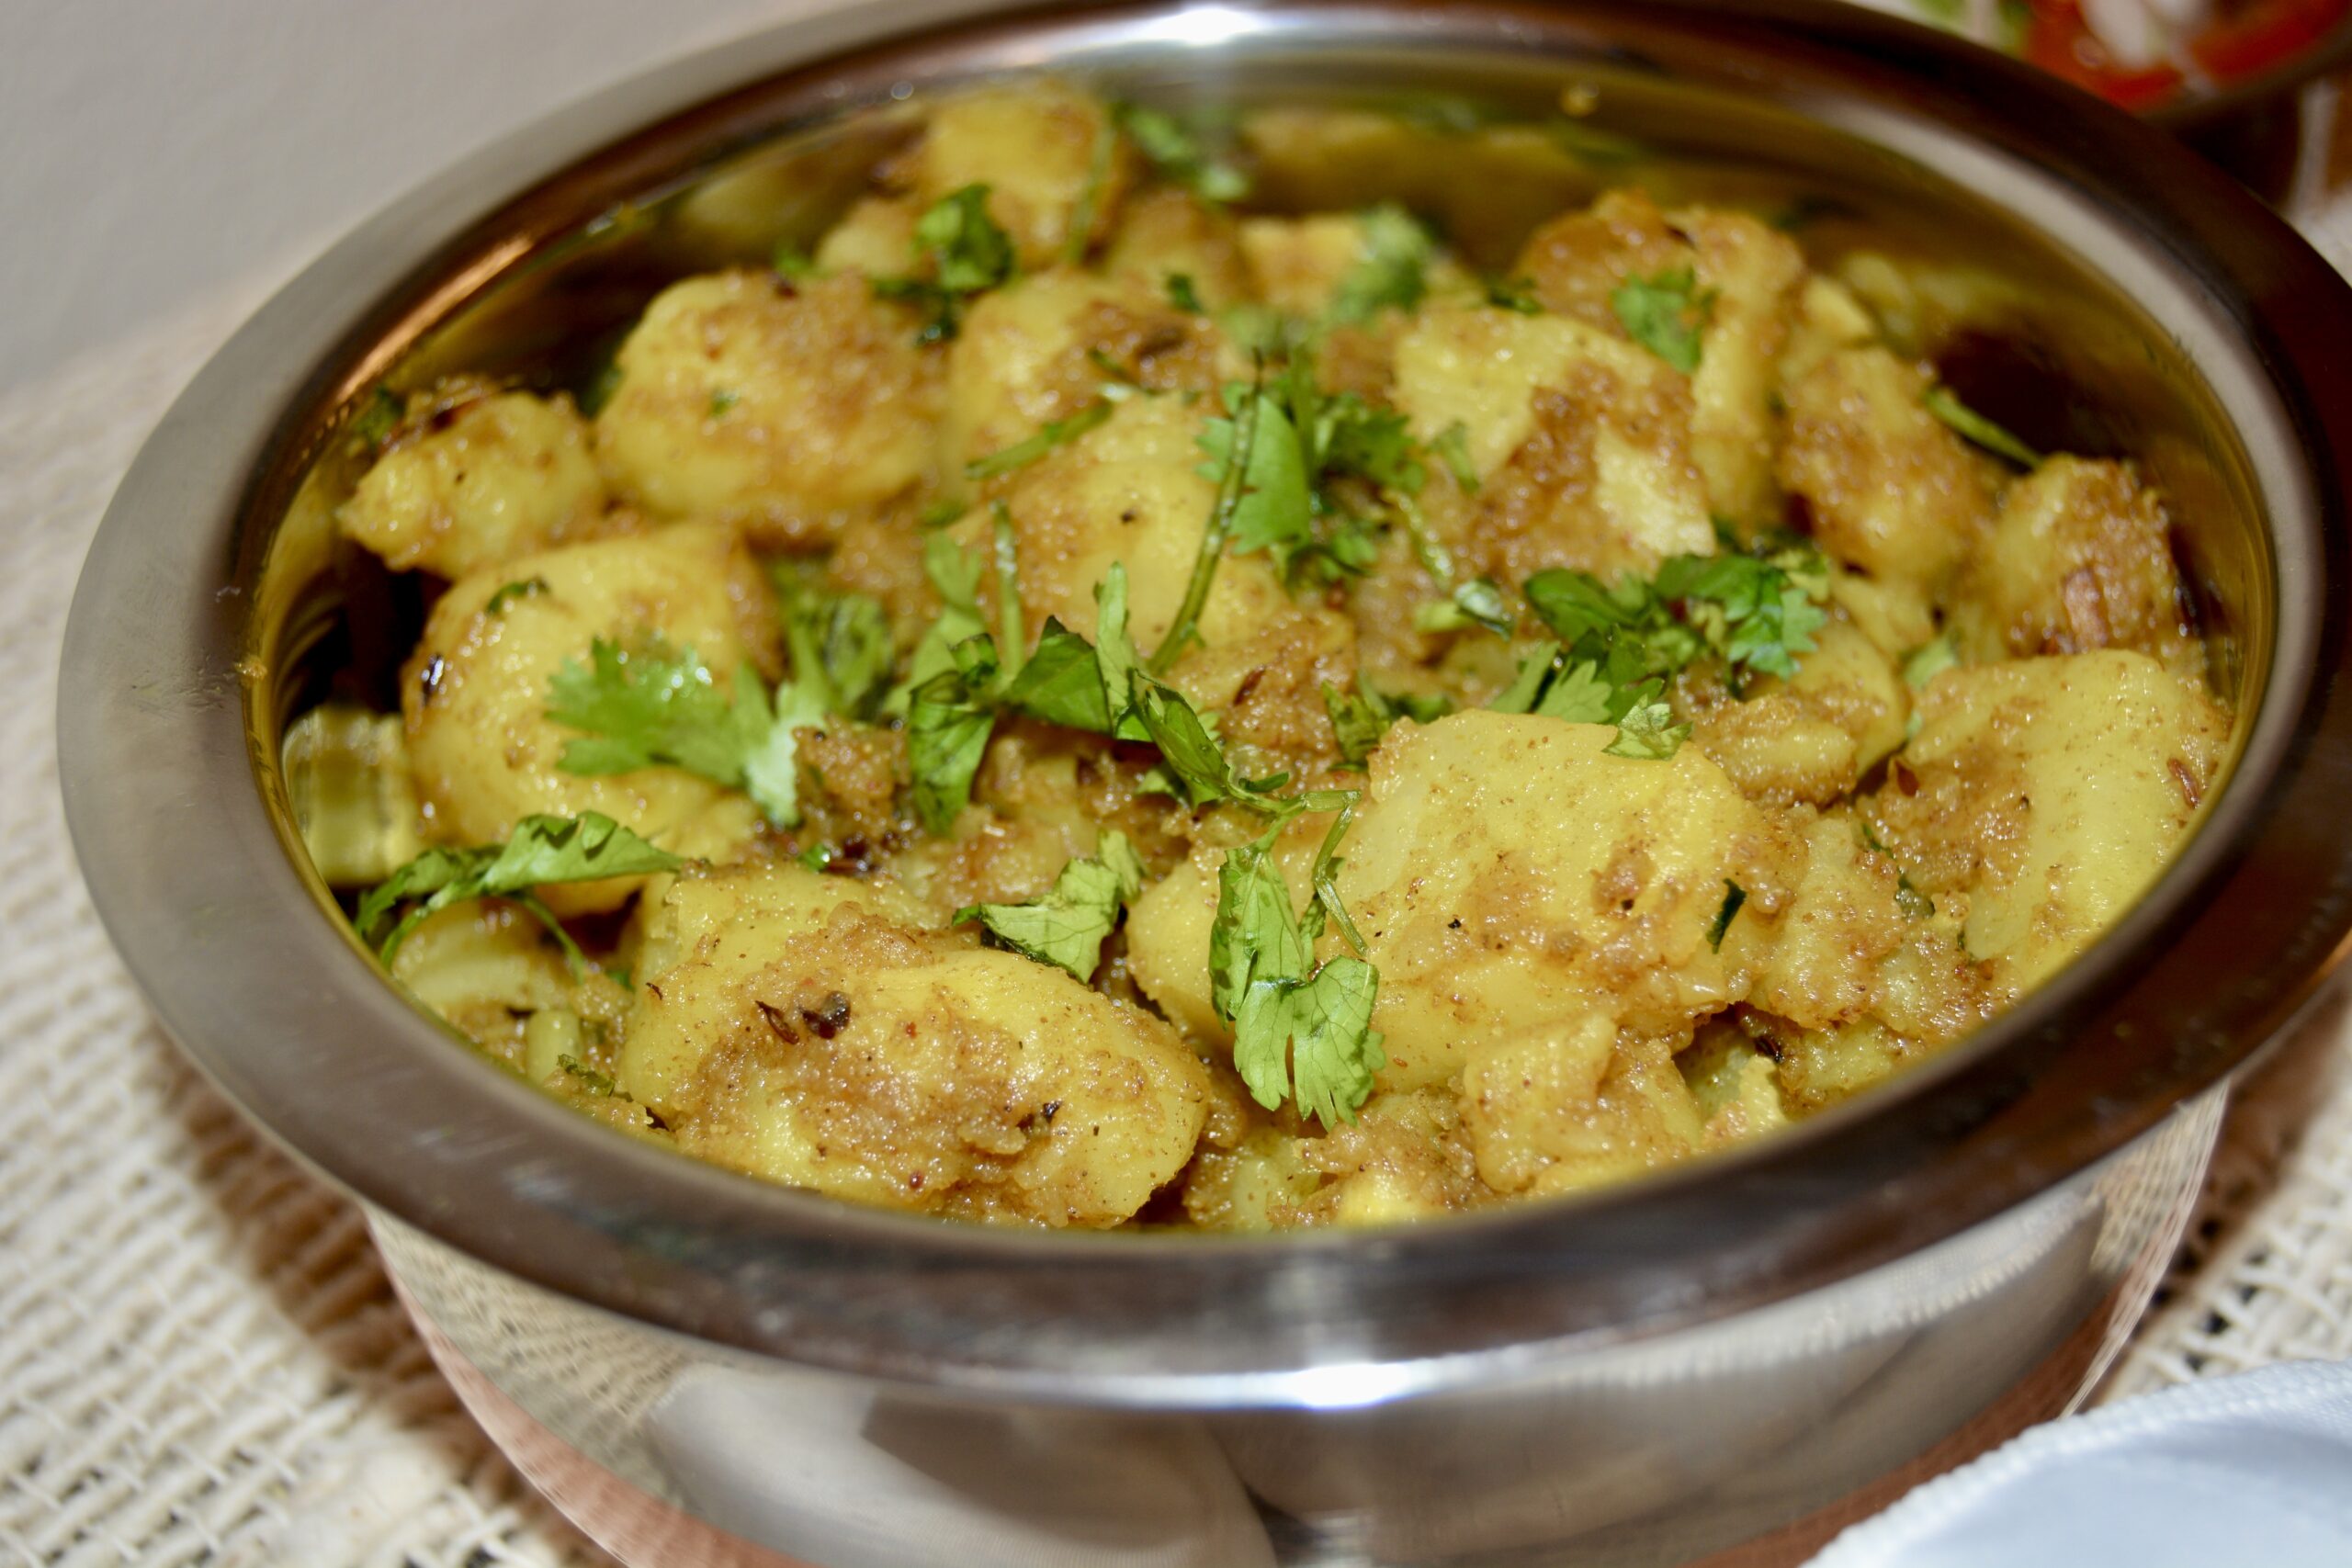
Masala Sukha Allu (Spiced Potatoes)
A spicy and tangy potato recipe is a quick and easy addition to any meal.
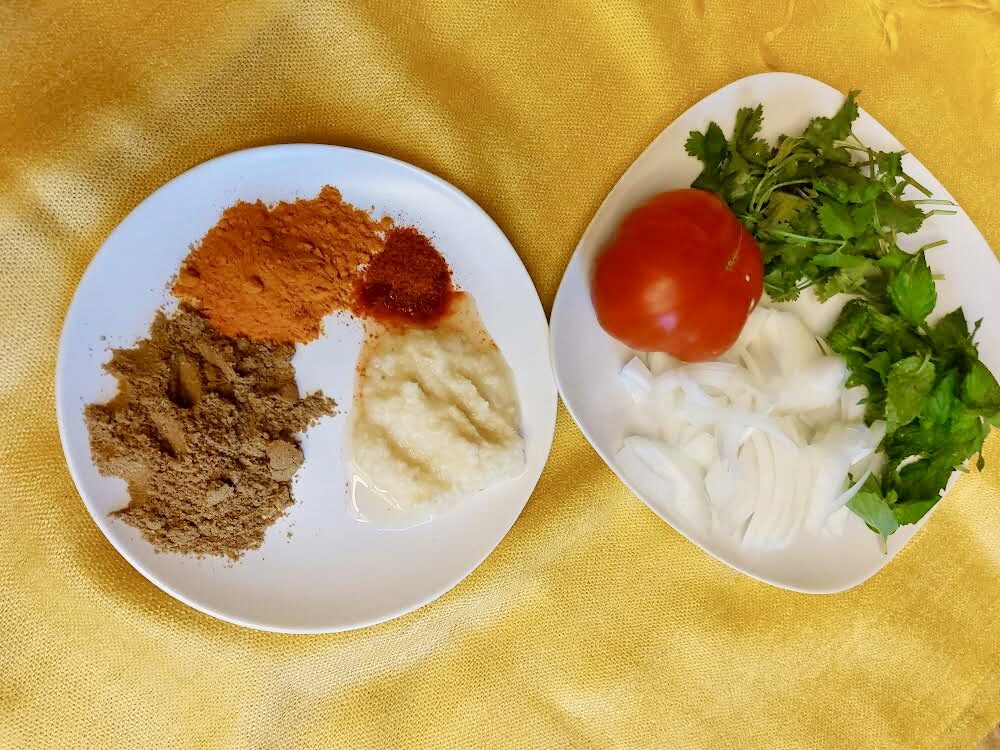
Ingredients
- 5 medium potatoes (about 2 pounds )
- ¼ cup cooking oil
- 1 tsp fresh finely chopped or grated ginger
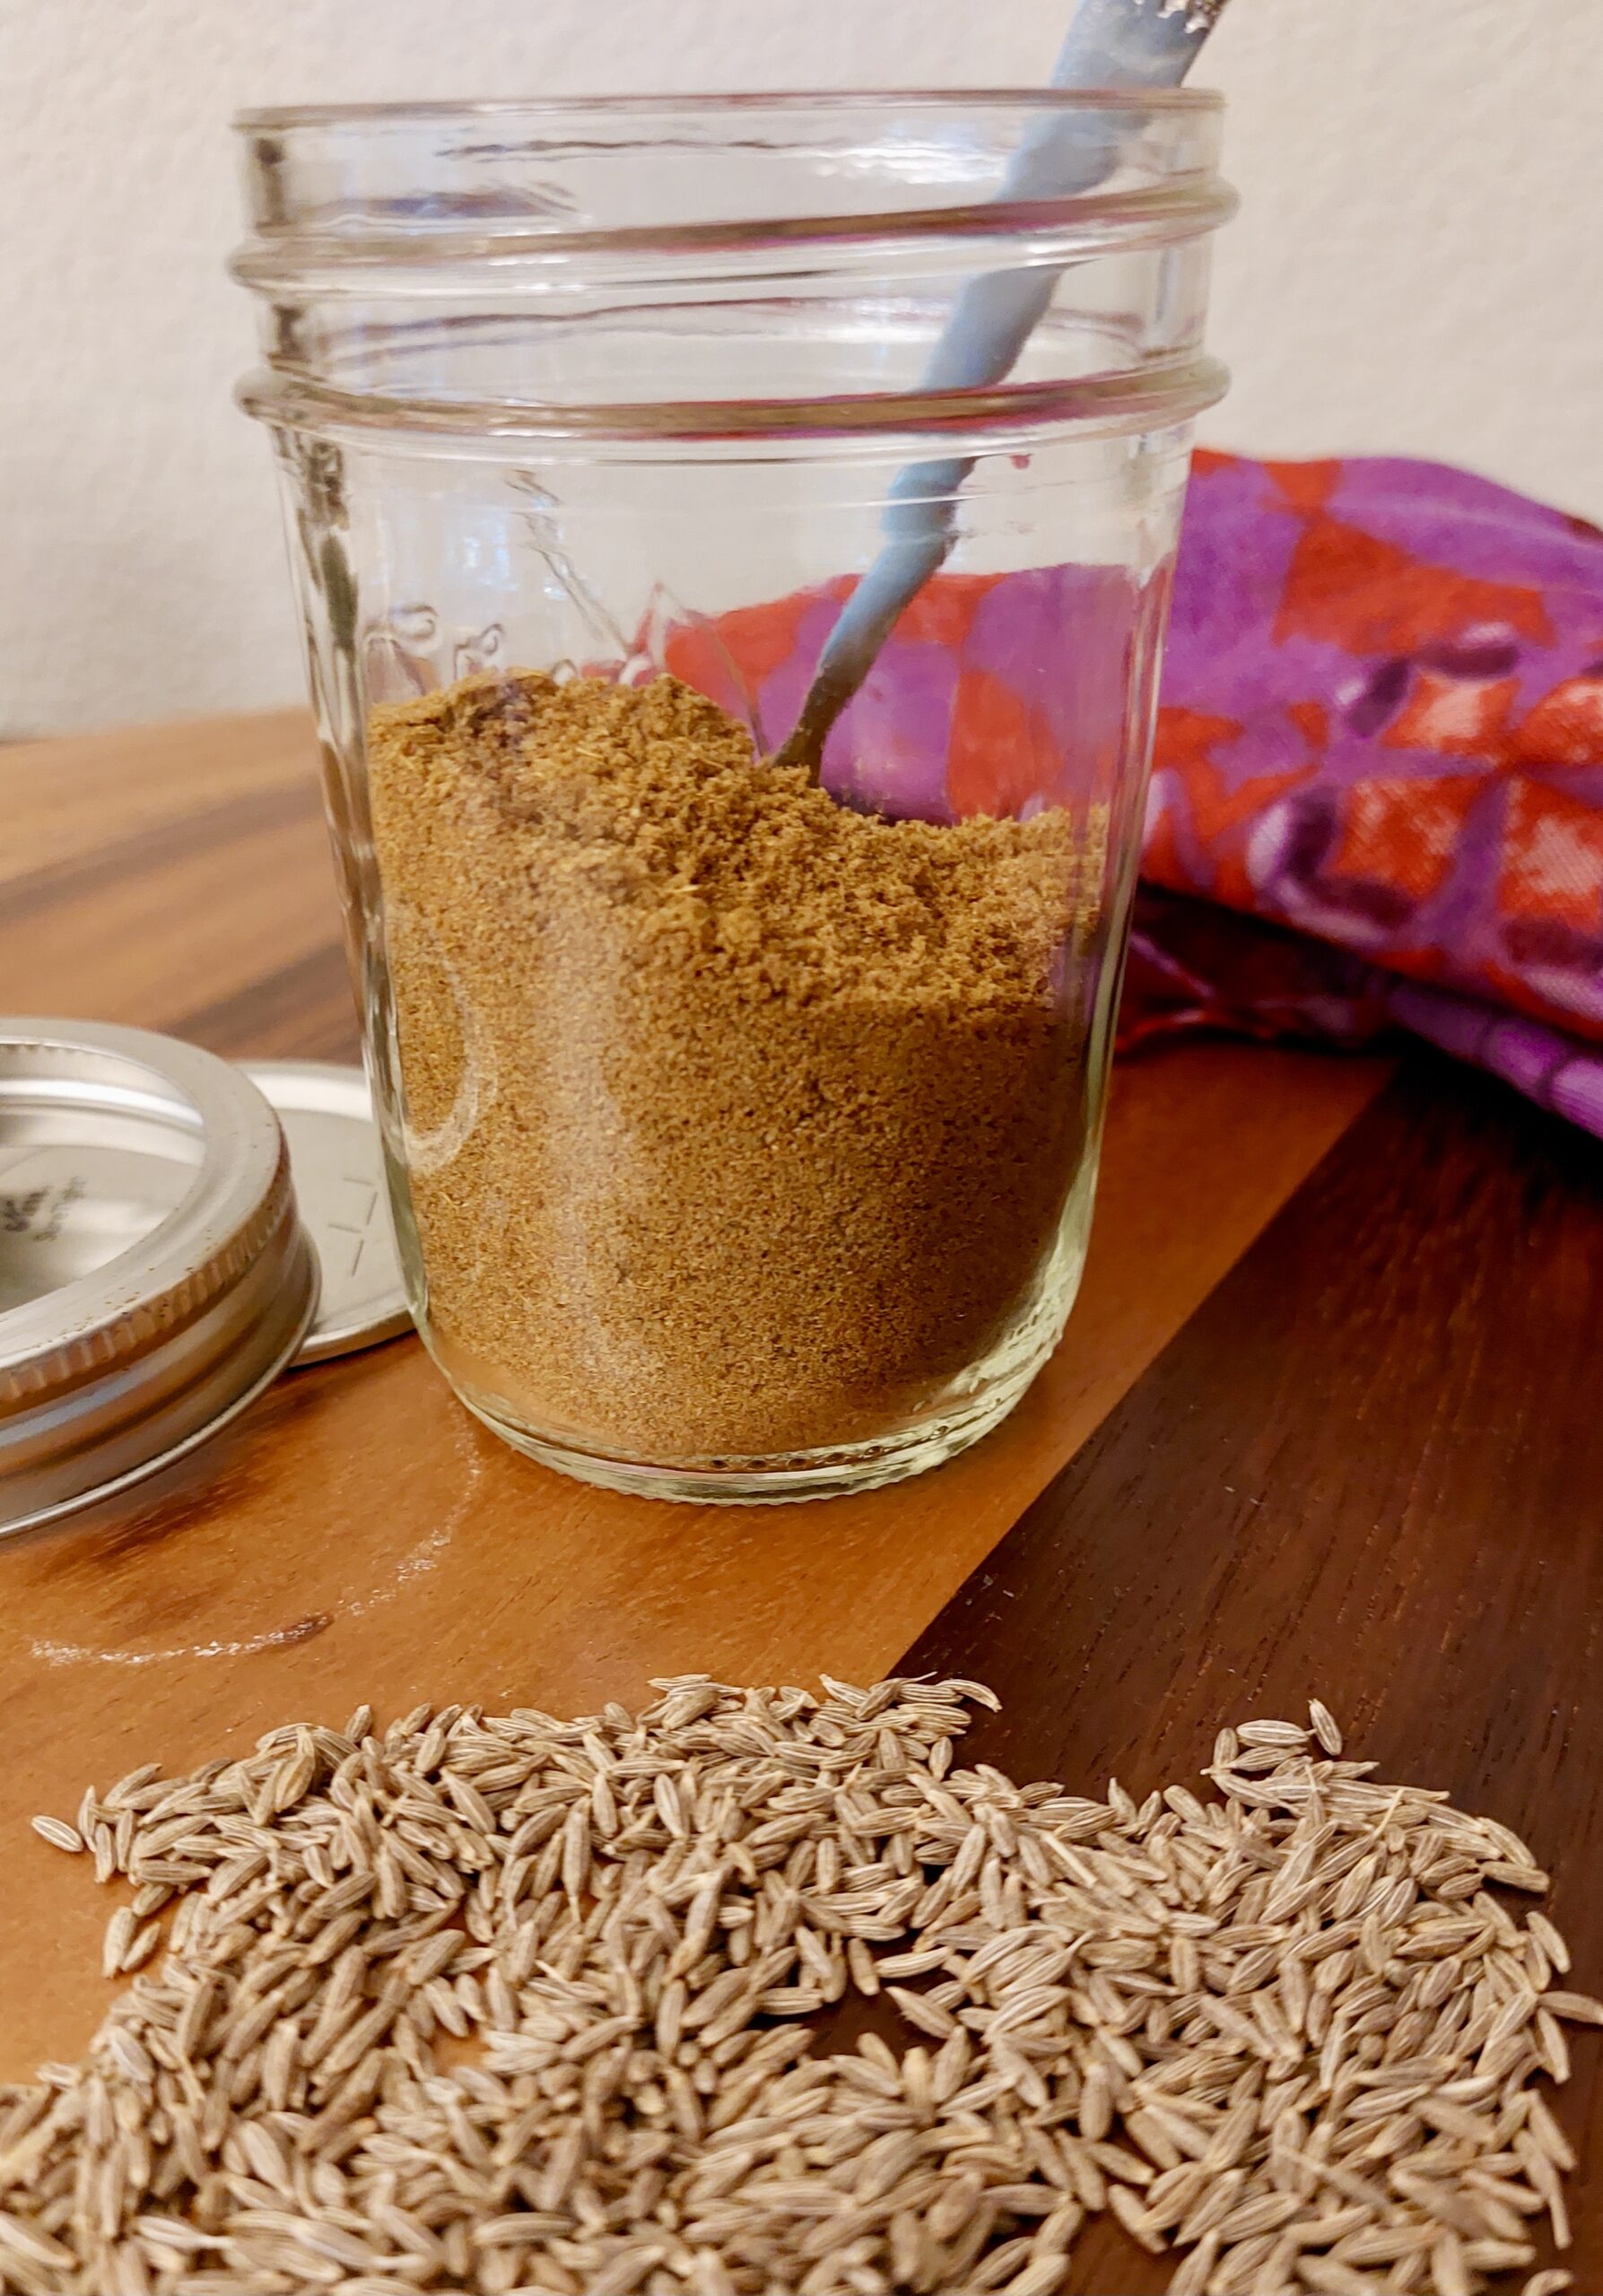
- 1 tsp cumin seeds
- ½ tsp red chili powder (more or less, to taste)
- ½ tsp turmeric powder
- 2 tsp coriander powder
- 1 tsp cumin powder
- 1 tsp dry mango powder (amchur, available at Indian grocery stores)
- ½ tsp garam masala
- 2 Tbsp fresh chopped cilantro leaves
- 1 Tbsp fresh chopped cilantro leaves (for garnish)
Instructions
- Scrub the potatoes and boil them until they are done. Make sure they do not over-boil and split.
- Drain and cool. When cool enough to touch, peel and dice into ¾-inch cubes. You don't have to be precise. Bite-sized bits will do. Set aside.
- Add the chili, turmeric, coriander, and cumin powders in a small bowl. Mix and set aside.
- Heat oil in a wok or skillet on medium heat.
- When the oil is hot add the ginger and cook for 30 seconds.
- Add the cumin seeds and let them sizzle for about 30 seconds. Be sure they do not burn.
- Now add the mixed spice powders and stir for 10 seconds.
- Add the cubed potatoes, dry mango powder, and garam masala. Gently stir the potatoes until nicely coated with the masala, about 3 minutes.
- Let cook another 5 minutes, stirring occasionally.
- Add the chopped cilantro and stir it into the potato mixture for 2 minutes. If the potato sabzi looks a little dry, drizzle more oil over it. Potatoes tend to absorb a lot of oil. Do not overdo the oil, as you do not want the potatoes to taste oily.
- Spoon into a serving dish and sprinkle with cilantro chopped for garnish.
- This potato dish goes well as a wrap in a paratha, roti, or tortilla. It also pairs well with any dal (lentil) and is a great addition to any Indian meal.
Notes
I normally use a manual pressure cooker or the Instapot to boil the potatoes as it speeds up the cooking process. Just follow the manual for pressure cooking time.
If the potatoes do break up, don't panic. Just use them to fix my Dosa Allu recipe as that will go well with other meals as well.


")
")


")